Artifact Snap and AppImage for Linux

Some time ago I added an AppImage for my old game Artifact, as an easy way of installation on Linux. AppImages have a neat architecture, and hopefully will keep Artifact running for a long time on a lot of systems. AppImages can also be run sandboxed using Firejail if you have little trust in me or the source of the AppImage.

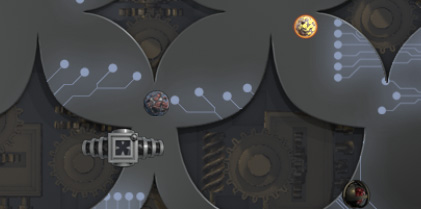
Artifact running as a Snap

Now, AppImages do not really have a nice centralized location where applications can be discovered. There are some initiatives, but it feels a bit crude and lacking some polish.

Snaps and their central registry on the other hand feel way more polished. If anything the content in the store often feels unpolished compared to the store. Snaps also run sandboxed by default. While this is good, it sometimes causes unexpected issues, and can be opted out of.

Making a Snap of a LWJGL 2 application was a bit of a headache, but it worked out in the end. My experience with the Snap documentation in general was good, and most of the work was a breeze after I got the game running as a Snap.

Now, go play some Artifact on Linux!

♥ Princesses versus giraffes ♥

TLDR; I’m writing a coop multiplayer game with my daughter, this is the current result! Works in Firefox and Chrome. Use arrows to move and space to fire. Share a URL to play with a friend.

Some years ago, my daughter figured out I made some computer games, and she even played one of them quite a bit. After a while she wanted something new, and we figured we’ll make a game together. She would draw concepts and come up with ideas, and I would try to make them happen in game.

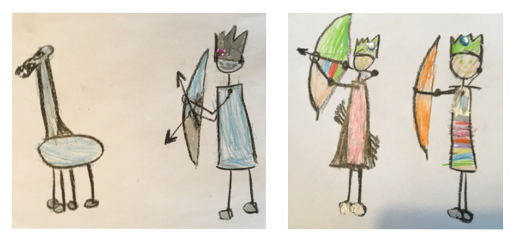
The initial concepts she drew were these:

We then together made them into vector with some modifications.

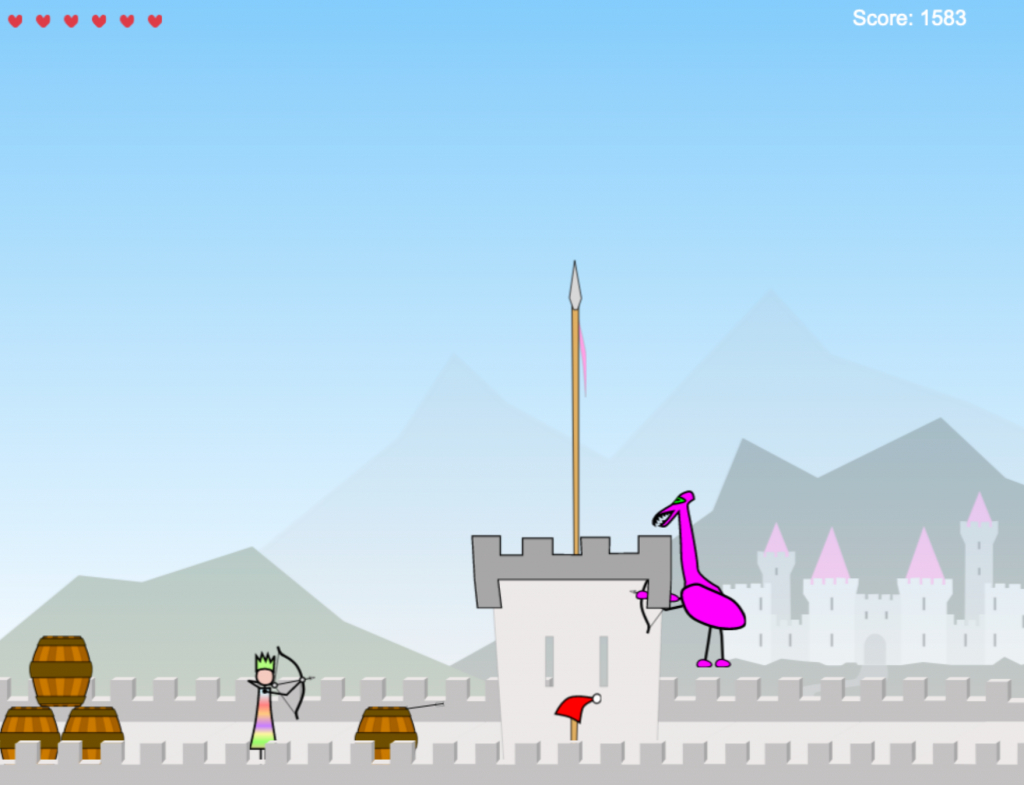
Princess and "giraffe"
A princess and a giraffe… I guess

Tips on kid friendly vector drawing programs would be very much appreciated, throw me an email or post a comment. We used Sketch, but Sketch is a bit overwhelming and distracting with all its features. I want a program which only have bezier patches and transformations on them, as well as fill, stroke and possibly opacity settings.

Going from concepts to a prototype

I had been wanting to try compile to JS with Kotlin for a while, so I started a project in IntelliJ and quickly threw something together using a plain HTLM5 Canvas.

We drew some more concepts, and after some evenings implementing we had an infinite randomly generated castle, an arrow firing princess, a hyperactive bow carrying giraffe, and a bunch of collision detection bugs (yay for rolling your own).

Wriggling out of hard requirements

After a lot of fun triggering bugs, my daughter came up with some new requirements.

I want to play with my friends, and we should all be princesses!

These are sort of hard to implement, disregarding networking, it would mean a total rewrite of how the world generation and camera worked. It would also need a solution for how to avoid someone getting stuck due to the camera movement of others and so on.

Those giraffes are in for a surprise.

After some bargaining we made some new concepts, and we agreed to add a player controlled cloud, and a bunch of new giraffes.

Adding networking

For me this meant that I would need to add some kind of networking to the game. For browser games, the choices are:

  1. Communicate with a server using WebSocket and have that relay state, or run the game on the server.
  2. Negotiate a WebRTC datachannel, and send communication directly between the browsers.
  3. Have players install a browser extension like netcode.io,and use it instead of WebSocket.

Since the game is cooperative, there is little reason to run the game on a server. Actually I really, really do not want to run the game on server, for a bunch of reasons, mostly for abuse and scaling troubles.

Using a server as a relay of state or input is also a bit funky, since it will introduce a lot of unnecessary latency. Since I am also willing to sacrifice some poor kids behind a symmetric NAT, I decided for option 2 and I have not regretted that.

I was cautious about doing this initially, since I had read this Gaffer on Games post which deemed WebRTC too complex, though that was in the context of server based architectures.

Having some more experience with WebRTC now, I agree a bit about the complexity, though I think it has gotten way better, especially with a more stable standard and more complete alternative implementations like rawrtc. I also ♥ how WebRTC abstracts away most of the P2P complications behind a very nice API.

Autorative peer or GGPO?

To share state in the game, I needed to come up with an architecture for networking. Initially I evaluated using something like GGPO, but in the end I chose to go with using the princess peer as an autorative peer, and sync the state to the cloud playing peer continuously, while the cloud peer only sends input. I chose this mostly for simplicity and time constraints. Since the game is cooperative, a lack of fairness is also not really a problem.

For the amount of work i put in, I am very pleased with how the networking worked out. Right now it is not tuned at all, just JSON over the datachannel, but even without tuning and no extra speculative integration, it has worked fairly well.

Where to go from here.

While the game is in a state of continuous updates, I think it is mostly just going to be small changes from now on. Maybe some sound effects and new graphics when we feel like it.

Rendering is currently also quite slow, and takes a lot of the frame budget. I would like to migrate to a framework with a WebGL based renderer. But sadly that seems like quite a bit of work, mostly due to using SVGs for graphics.

For future projects game projects, I will for sure start with a WebGL based framework, or possibly Unity tiny, and raster based images.

That is all for now, go and see how far you can get in our game!

Draft Engine

Start a draft

For a while I have been working on a generic draft engine for card games. In trading card games (TCGs), drafting is a way to distribute cards in a semi random way, where players interact with how cards are distributed. In the TCG world this is distinct from sealed deck (semi randomly distributed cards, but no player interaction during dustribution) and constructed (you design your deck before playing from a set of allowed cards).

Supported draft styles

My draft engine supports two styles of draft:

  • Grid draft: A draft style for two people where you select rows or columns of cards from 9 face up cards.
  • Regular draft: In this draft style you pick a card from a pack and pass the pack to the next player. It works with 2-8 players, but 6-8 is recommended.

grid draft
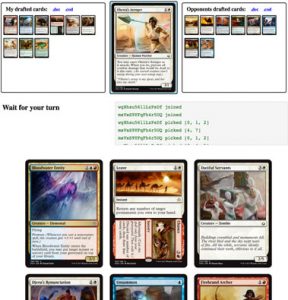
The draft engine in action. This example is an Magic the Gathering grid draft.

These forms of draft can be used for most kinds of TCGs. Since the engine is not tied to any specific kind of game, you can draft anything you can give a name and an image. You can draft your family photos if you want to.

Drafts with custom content

The engine works by using a very simple JSON structure to supply card names and card images, it looks like this:

[
  [
    {
      "name": "CardOnePackOne",
      "url": "http://crazymedia.com/cardonepackone.png",
      "id": 0
    },
    {
      "name": "CardTwoPackOne",
      "url": "http://crazymedia.com/cardtwopackone.png",
      "id": 0
    }
  ],
  [
    {
      "name": "CardOnePackTwo",
      "url": "http://crazymedia.com/cardonepacktwo.png",
      "id": 0
    },
    {
      "name": "CardTwoPackTwo",
      "url": "http://crazymedia.com/cardtwopacktwo.png",
      "id": 0
    }
  ]
]

The values are pretty self explanatory, but for clarity:

  • “name” – The name of the card, which you can export when finished drafting.
  • “url” – An URL pointing to an image of the card.
  • “id” – Not in use, so 0 is a fine value.

The engine comes with several predefined card list. Packs will then be drawn from those lists, but if you want to supply your own set (for example a cube or your own game) it is possible to start a draft where you send in any number of packs of cards using the JSON format shown above.

Have fun drafting.

Writing a WebRTC data channel implementation

After looking at webtorrent a while ago I really wanted to dig deep down into WebRTC to see how it actually worked. WebRTC is a web standard that allows two browsers to set up a peer to peer connection (usually browsers only talk through intermediary servers). It also brings unreliable and unordered networking to the browser, which is great for some kinds of applications.

WebRTC

Searching for WebRTC and Java on Github mostly gave me some very simple applications that use a Java server to set up a peer to peer application between two browsers. There also seemed to be some unmaintained JNI wrappers for the WebRTC libs. What I wanted was a pure Java WebRTC implementation so that I could talk directly to the browser more on my terms.

Since this was lacking I decided to try to write my own Java WebRTC implementation. To limit the scope, I decided that I would only try to talk to Firefox, and only support an unordered unreliable DataChannel. Which is WebRTC’s greatest selling point for me. What I ended up with can be found on my profile on GitHub. It is not pretty or solid, but it sort of works.

Protocols

WebRTC is made up of bunch of protocols: ICE (to establish communication), STUN (binding and NAT traversal), DTLS (encryption), SCPT (over UDP) (message flow control), TURN (fallback for difficult network situations, which I have chosen to ignore).

The initial part of starting a WebRTC connection uses the ICE protocol, the ICE protocol is typically carried out over an encrypted WebSocket connection, though you can use encrypted pigeons if you like.

To be honest I have not looked a lot at ICE, but the parts most relevant for WebRTC works a bit like this:

  • A goes: This is my password and certificate signature, this is referred to as an offer.
  • B goes: This is my password and certificate signature, this is referred to as an answer.
  • Then A and B send each other different options of connectivity as candidates. I am currently blissfully ignorant of how this is supposed to work, in my current implementation I just send the first candidate from the browser and replace IP, port and auth data in the response.

The message format used in the browsers WebRTC implementation for offers and answers is JSON containing an SDP. The SDP contains tons of information that is not used (afaik). The values I have touched are marked in green below, for more information about the fields, this is a great overview.

The green highlights the important parts of the offer and candidate
The important parts of the offer and candidates, this is SDPARTA!

Important SDP values:

  • fingerprint:sha-256 – DTLS certificate sha-256 fingerprint.
  • ice-pwd – Your chosen password for STUN.
  • ice-ufrag – Your chosen user for STUN.
  • 192.168.1.100 58713 – Your offered address and port.

STUN

Once candidates have been exchanged, a STUN binding request is sent to establish connectivity, this request must be responded to with a binding response with a xor mapped address. The received message integrity hash is a HMAC-SHA1 which can be checked against the message hashed with the ice-pwd as key.

DTLS

After the STUN the next step is a DTLS handshake. Thank you Legion of the Bouncy Castle, without you I would have given up here.

Over the same UDP socket where DTLS is running, STUN must be multiplexed. STUN is here used to send “consent” requests every X seconds. If you do not respond to the STUN the browser reports ICE error and shuts down the connection. Bouncy Castle DTLS will silently drop these STUN “consent” packets, so this was a pain to figure out and debug.

SCTP

Once the DTLS is set up an SCTP connection is initiated. SCTP can be configured to work in all constellations of ordered/unordered and reliable/unreliable.

SCTP over UDP challenges

With SCTP over UDP several issues crop up. My main languages are all JVM based (Kotlin, Java). There is no SCTP implementation in Java, but there is an API for the systems SCTP. The API is very hard to integrate with an UDP socket though (I tried a bit, but it seemed very hard), so the simpler solution is probably to use a userland C lib like the one used by libjitsi.

Sadly i did not know libjitsi existed so I started hacking my own SCTP implementation in Java land. Way more fun…

Writing my own SCTP implementation

The SCTP spec is mostly ok, if a bit unclear in some parts. Once I found the SCTP parameter list it got better. It should also be mentioned that SCTP uses a CRC32C for checksums, this differs from the one used by STUN. This took me quite a while to figure out.

I currently have a very minimal “working” SCTP implementation. Meaning that it can talk to a browser, but does not shut down nicely, and does not do congestion control, and does not handle resends properly. These are very tricky areas to do well, and I have no clue, so I will probably change to use the lib used by libjitsi.

Getting the all important firefox logs

To not go in blind when debugging, logging from the connected browser is invaluable. This is my script to run firefox with WebRTC logging. The different modules can be turned on and off by not including them in the NSPR_LOG_MODULES. It took me a while to figure out the correct modules, so hopefully this helps someone else.

#!/bin/bash
dat=`echo ~`
path="$dat/webrtc_firefox.log"
export NSPR_LOG_FILE=$path
export NSPR_LOG_MODULES='signaling:5,mtransport:5,SCTP:5'
export R_LOG_LEVEL=9
export R_LOG_DESTINATION=stderr
open /Applications/Firefox.app/

Where is the code?

If this was interesting and you want to take a look at the source code. It is available on my GitHub profile.

Scape – a very ninja scripting language


I made a small scripting language that runs in the browser. It is very ninja. To see the ninja, first open Javascript console and write:

function recur() {recur()};recur();

Hopefully it blew the stack. Then type this into the Scape REPL:

def recur() recur(); recur();

When you are convinced it will infinitely loop without blowing the stack, hit ctrl-c to stop further processing.

Rincewinds rave, that is black magic! Also called tail call elimination. Scape code is not evaluated by snarfing functions from Javascript (JS functions do not have tail call elimination before ECMAScript 6), but instead is compiled to its own set of instructions, which are then run on a stack machine (running in the Javascript VM). During parsing Scape functions are checked for whether they can use tail call elimination. If they can, they get different instructions that reuse the existing stack frame.

More magic

Scape has forward mode automatic differentiation as a language feature. Automatic differentiation allows you to compute the derivative of a function, without having to define the derivative explicitly.

Without automatic differentiation, this would be the way to compute the partial derivative of the function f(x,y) =  x^{2}y^{2} for x and y:

def fun(x,y) * (* x x) (* y y);
def diff_fun(x,y) [* (* 2 x) (* y y),* (* 2 y) (* x x)];
diff_fun(4,5);
[200, 160]

With automatic differentiation in Scape, this is how it is done:

def fun(x,y) * (* x x) (* y y);
diff(fun(4,5));
[200, 160]

This is very useful for a number of numerical methods involving derivatives. The feature is currently experimental, it might interact with non-double types in funky ways.

Wai?

Mostly just for fun. I also started toying with the idea to make a safe scripting language for use in networked games. A language and runtime that would allow the player to define custom logic during gameplay without being able to ruin the experience for other players.

A dream would be a personalized Starcraft where it is you and your custom control scripts versus the other player and his scripts.

I hope to create a simple real time multiplayer game to show how I imagine it working. For now, playing with the Scape REPL is the only way to try the language.

Sayōnara

Artifact-1.0.2

Today I released Artifact-1.0.2 after finally getting my ass around to create a close to fully automated build script for Mac OS X (a topic for another blog post). The full changelog is listed below, but I instead recommend you go get it and try it!

mech-sec-new
New second orb graphics

Changelog:

  1. Added full screen and resolution management in game.
  2. Removed splash screen.
  3. Adjusted difficulties and added new names (Apprentice, Journeyman, Master).
  4. Added additional fire button, allowing better control using a touch-pad.
  5. Redesigned second orb with additional graphics and new behavior.

More in detail:

  1. The splash screen in Artifact was unnecessary and the only issue keeping me from removing it was having in-game window and resolution management.
  2. See above.
  3. The Normal and Hard game difficulties were hardly different in version 1.0.0, while the Not sane difficulty was extremely hard. Now the Apprentice difficulty is much easier then the old Normal, Journeyman is similar to the old Normal, while Master is slightly easier then the old Not Sane difficulty. The change was mainly done to make the initial difficulty easier for new players.
  4. On a touch-pad moving the mouse and clicking might interfere with each other, so I added an alternate fire welder button for those who might prefer that.
  5. The Second orb was very hard to predict and its mechanic felt wrong. The new version is cooler , and most of the time way easier to predict. It also has a slight comeback factor, which is nice in this cutthroat game.

Prepare your Welding Blaster; play Artifact

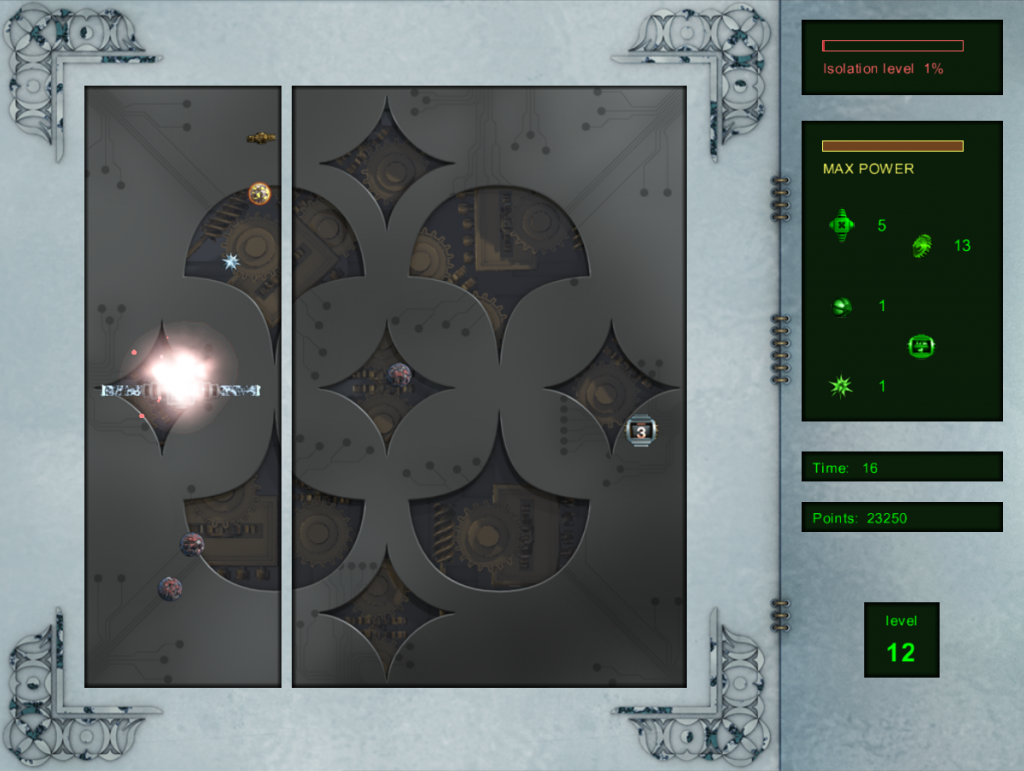
I made a computer game together with Nils Eriksen Meling and Sven Meling; It is named Artifactgo try it! It plays similarly to Barrack, a favourite game from my youth. In addition to the action and strategy found in Barrack, Artifact also adds an aspect of resource management.

blaster
Prepare your Welding Blaster, the Artifact is a cruel mistress

In Artifact, each of 40 levels consists of a screen filled with a variety of different orbs. These orbs must be isolated by you. Once 75% of the playing field has been isolated, the level ends. You are rewarded for playing fast, and for ending the level with a high % of the screen isolated.

crystalsOn
Electricity is key

To accomplish your task you control a dual-direction Welding Blaster that can be transformed to fire vertically or horizontally. When fired, a welding beam will slowly traverse the screen in 2 directions. Once both ends reach a wall, the playing field will be cut, isolating balls on each side of the beam. However, care must be taken not to hit the orbs, as they will create a feedback surge, damaging the Welding Blaster.

future_whole
I hate orbs

Artifact is free and will stay so, but developing and maintaining it is not free. If you enjoy Artifact, I hope you will consider a donation. However, most of all, I hope you enjoy playing it.
If you have problems with installation on the supported platforms, please send a mail to: .

Download Artifact

Useful if caught in overly simplistic space combat

One of my favorite games, and by far the one I used the most time creating content for during my youth is Escape Velocity Nova. The Escape Velocity series are 2D space RPGs, which means there is lots of 2D space combat. In these types of games you typically have three main types of weapons, non-turreted, turreted and homing. Non-turreted and homing weapons are not really that complicated. The non-turreted fire in one direction (typically forward), while the homing weapon typically turns as hard as it can towards the target at maximum speed. Turreted weapons were always a puzzle to me though, they somehow knew where you would be, and fired to intercept your ship. I always wondered how this was done.

Some years later during a visualization class (on how to find intersections between geometric primitives) I was wondering if I could use geometric equations to figure out where a spaceship needs to aim its torpedo, if it knows the position and velocity of the target. Below is the solution I came up with. It assumes constant speed for the target and the torpedo.

The positions of something moving at constant speed, can be described by this equation where t denotes time, \vec{v} the current velocity and \vec{p_o} is the starting position. This restricts the position of the target to a line, where the position on the line is determined by t.

(1)   \begin{equation*} \vec{p} = \vec{p_o} + \vec{v}t \end{equation*}

For 2 dimensions this is:

(2)   \begin{equation*} \begin{pmatrix}p_x\\p_y\end{pmatrix} = \begin{pmatrix}p_{xo}\\p_{yo}\end{pmatrix} + \begin{pmatrix}v_x\\v_y\end{pmatrix}t \end{equation*}

The possible locations p of a constant speed (s) bullet fired from point c in any direction, are given by this equation, where again time is denoted by t. This restrict the possible positions to a circle which expands with time.

(3)   \begin{equation*} (st)^{2} = (\vec{p} - \vec{c})^{2} \end{equation*}

For 2 dimensions this is:

(4)   \begin{equation*} (st)^2 = (p_{x} - c_x)^2 + (p_{y} - c_y)^2 \end{equation*}

Now inserting the restrictions on p_x and p_y from 2 into 4 gives a polynomial that only depends on t:

(5)   \begin{equation*} (st)^2 = ((p_{xo}+v_xt) - c_x)^2 + ((p_{yo}+v_yt) - c_y)^2 \end{equation*}

Rearranging gives:

(6)   \begin{equation*} s^2t^2 = (p_{xo}-c_x + v_xt)^2 + (p_{yo}-c_y + v_yt)^2 \end{equation*}

Simplifying by setting constants i = p_{xo}-c_x and j = p_{yo} - c_y and moving towards standard form:

(7)   \begin{equation*} s^2t^2 = (i)^2 + 2iv_xt + v_x^2t^2 + (j)^2 + 2jv_yt + v_y^2t^2 \end{equation*}

Rearranging to standard form:

(8)   \begin{equation*} 0 = (v_y^2 + v_x^2 - s^2)t^2 + 2(iv_x + jv_y)t + (i)^2 + (j)^2 \end{equation*}

This is a quadratic equation, with coefficients:

(9)   \begin{equation*} a = v_y^2 + v_x^2 - s^2 \end{equation*}

(10)   \begin{equation*} b=2(iv_x + jv_y) \end{equation*}

(11)   \begin{equation*} c=i^2 + j^2 \end{equation*}

Solving the quadratic equation gives two solution for t, if an answer is positive and has no imaginary part, there is a solution to the problem.

Inserting a solution for t in equation 1 gives the x,y coordinates where the torpedo should be aimed, and where it will hit the target.

Below is an implementation of this, where the constant speed of the torpedo can be set. If there are two solutions, the smallest t is chosen. If there is no solution (typically because the target it too fast for the torpedo to catch) the torpedo is never launched.


canvas

As you can see in some cases, this does not take into account the size of the target, only the targets center. This can be remedied by using a representative selection of boundary points of the target instead, and firing if one of them would connect.

The solution does also not take into account how fast the target can change direction, or when the torpedo runs out of fuel. This can be handled by not firing if the time from the torpedo is fired to the impact is too long.

This method can also quite easily be expanded for an accelerating weapon or target. This will result in a higher degree polynomial though, which are mostly only possible to solve using numerical methods like Newtons’s method for example.

Tips for more robust GPU programs using C++ and OpenCL

When I started programming for the GPU, I struggled to keep my GPU programs robust. This was partly because I was very new to C++ and C. OpenCL is very low level and this in combination with my inexperience led to a lot of not so robust prototypes. While my code worked for prototypes, it was very cumbersome to code and not very reusable.

In this post I will share some of the solutions I found to some of the issues I had. These deal with allocating and releasing memory on the GPU, as well as converting relatively cleanly between STL vector and GPU memory representation.

Simplifying release and allocation of memory

Basic memory allocating on the GPU using OpenCl is done by using the code below. Where memory is a reference to the memory on the GPU.

cl_mem memory = clCreateBuffer(context, CL_MEM_READ_WRITE, 
                               numberOfBytes,NULL, NULL);

To release the memory allocated, the below function has to be called with the memory object as argument.

clReleaseMemObject(memory);

This leads to several ways to leak GPU memory. Especially if your code throws exceptions or does something else which “looses” the reference to the memory object and you forgot to release the memory explicitly.

A way to mitigate this in C++ is to create an object which on initialisation allocates memory, and which when its destructor is called release the memory. This ensures that when the object goes out of scope or is deleted the memory on the GPU is also released. This is basically RAII (Resource Acquisition Is Initialization)

A very basic (leaving out code for copy constructors etc) object for GPU memory would look like this.

class GPUMemory {
private:
    cl_mem memory;
public:
    GPUMemory(size_t e,const cl_context &ctx) {
        memory = clCreateBuffer(ctx, CL_MEM_READ_WRITE, e,
                                NULL, NULL);
    }
    ~GPUMemory() {
        //release if out of scoped or deleted
        clReleaseMemObject(memory);
    }

    /*
     * Copy constructor, copy assignment operator etc goes here 
     * implementation should be according to your need 
     */
}

// Possible usage
void doAwesomeCalculation (size_t size,cl_context &context) {
       GPUMemory map(size,context);
       // Do calculation, throw exceptions, etc
} // Out of scope so GPU memory is released

This means that you do not have to explicitly release memory for every weird way your application could behave, which avoids a lot of code repetition and leak opportunities. As long as the memory in allocated in the correct scope you mostly do not have to think more about it. It should be noted that you should follow rule of three and implement copy constructor and assignment operator as well. The implementation may wary depending on how you want your object to behave. I’ll leave that for another blog post.

From vector to GPU memory

Vector is a very useful data structure when you want something sent to the GPU and back, since everything is stored adjacently in memory, no fetching or disbursing on the CPU side is needed. To convert a vector to the kind of memory object I designed above, this is the code i use:

template  GPUMemory createAndFillMemory(const vector data,
                                                    cl_context context,
                                                    cl_command_queue queue) {
   cl_int err;
   if(data.size() > 0) {
        GPUMemory mem = GPUMemory(data.size(),context);
        err = clEnqueueWriteBuffer(queue, mem.getMemory(), CL_TRUE, 0, mem.getBytes(),
                                       (void*)&data[0], 0, NULL, NULL);

        if(err != CL_SUCCESS) {
            throw runtime_error("Loading buffer failed");
        }
        return mem;
    }
    throw runtime_error("no content in vector");
}

As you can see the GPUMemory object has been extended to use templates, since the use I want in this case is a generic container for some struct. This saves a lot of code since you would need to do this conversion manually for each different struct you are planning to put on the GPU if you do not have a similar method. It also ensures that you do not make offset or type errors when converting to and from the different representations.

The GPUMemory class has also been extended to contain information about the amount of objects added, as well as type size.

Conversion back from GPUMemory object to a vector is done using this function:

template  vector readBackMemory(GPUMemory &data,
                                           cl_context context,
                                           cl_command_queue queue) {
   vector vec(data.getElements(),T());
   cl_int err;  
   if(data.getElements() > 0) {
        err = clEnqueueReadBuffer(queue, data.getMemory(), CL_TRUE, 0, data.getBytes(),
                                  &vec[0], 0, NULL, NULL);
        if(err != CL_SUCCESS) {
            checkError(err);
            throw runtime_error("Content not read back from GPU");
        }
        return vec;
    }
    throw runtime_error("No content in vector");
}

General conversion from a vector containing any object to GPU memory is not something I would recommend. While this is possible using the code above, conversion using these methods should be restricted to primitives and structs of fixed size. You should also avoid pointers, as it makes little sense to send a pointer pointing to objects in CPU memory to the GPU.

There is still room for mistakes as you will see by the following example. When you use memory on the GPU, no metadata carry over from the C++ code. So on the GPU side you are responsible for using the memory you transferred correctly, the methods above only ensure that the copying of memory back and forth from the GPU results in correctly typed and sized arrays.

An example

A simple example can be to copy some particles to the GPU, apply some calculation and then copy the particles back. On the CPU side I then define a particle struct:

struct GPUParticle{
    cl_float3 pos;
    cl_int identifier;
    cl_float3 direction;
};

On the GPU (OpenCL kernel) side, a simple kernel to be applied could look like this:

struct GPUParticle{
    float3 pos;
    int identifier;
    float3 direction;
};

__kernel void copyParticles(
                       global struct GPUParticle * data,
                       global struct GPUParticle * dataOut
                       )
{
    int x = get_global_id(0);
    //do calculation here
    dataOut[x] = data[x];
}

It is important to keep the structs on both sides similar in structure and byte size, so that there are no offset issues (you should run tests for this). This means that data is not type safe when sent and retrieved from the GPU, but I still think that partial type safety is much better then none at all, since this leave much fewer avenues for such errors to occur.

Finally to apply the kernel to the data I create this method:

vector Stuff::testCopy(vector &data) {
    GPUMemory mem = utils.createAndFillMemory(data, context, cmd_queue[0]);

    GPUMemory out = GPUMemory(mem.getElements(),context);

    size_t work_size[1];
    work_size[0] = mem.getElements();

    err  = clSetKernelArg(copyParticles,  0,
                          sizeof(cl_mem), mem.getMemoryRef());
    err |= clSetKernelArg(copyParticles,  1,
                          sizeof(cl_mem), out.getMemoryRef());

    if(err != CL_SUCCESS) {
        utils.checkError(err);
        runtime_error("Kernel setup failed");
    }

    // Apply kernel to data
    err = clEnqueueNDRangeKernel(cmd_queue[0], copyParticles,
                                 1, NULL, work_size, NULL, 0,
                                 NULL, NULL);
    if(err != CL_SUCCESS) {
        utils.checkError(err);
        runtime_error("Calculation failed");
    }
    return utils.readBackMemory(out,context, cmd_queue[0]);
}

There are of course problems where these techniques are not suitable or possible, but I use them a lot and they have made my GPU code much more robust. If you have suggestions for improvement or your own small snippets, please add a comment.

Some of my inspiration for this:
Bjarne Stroustrup Going native 2012

The never ending feature and bug fixing phase

At the moment I’m facing what might be the hardest part of game development. I have to make the decision: “The game is finished”. That is with the exception of game breaking bugs that might need fixing later.

This decision is hard, since I at the moment have a quite good and fun game ready, but there is a continuous stream of small changes I could do to make functionality better. None which are really needed for gameplay, but that make the game slightly more enjoyable. It is often really hard to evaluate which of these are important for player, or if it is a strive for perfection that no one will ever notice. Weeding out what is important with a small beta tester staff is hard.

On another front we have decided that the game will be harsh and hard. To use a term often used by Sirlin, it is quite slippery slope. I decided along with my main gameplay tester that it actually does not take that much away from the fun. This was also part of the decision to have an easier difficulty available, which really makes it easy to use the powerful tools you are given. What makes me very happy is that the tools really feel powerful, and can be used for nice tricks that are not all that apparent in the beginning. It is probably the part I’m the most happy with along with orb design.

That’ll be all the game design/development ranting for today