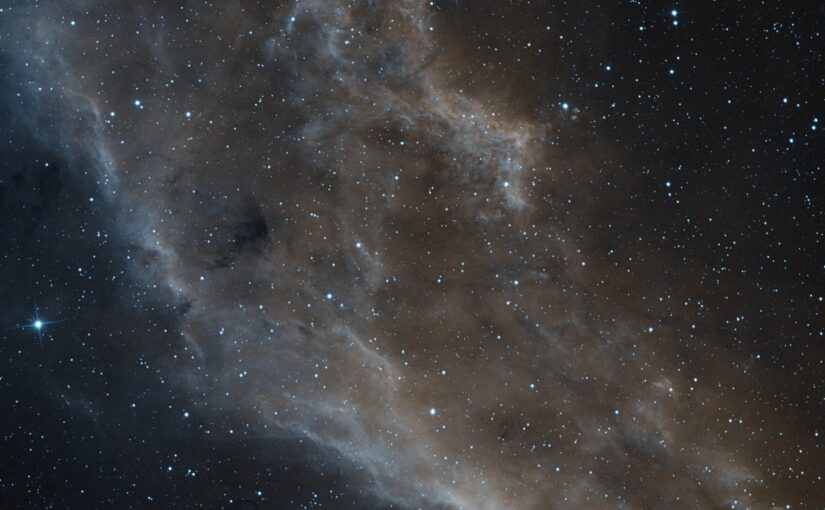
I finally had the chance to acquire data to finish up some astrophotography projects. Specifically I needed Sulfur II data for an image of the California nebula. For this project I wanted to try a color mapping I have not tried before. I wanted to use Hydrogen Alpha in the red channel, mix Ha and SII data for the green channel, and use SII in the blue channel.
This took me 10 nights of data collection from home, since I can only image from 30° to 45° elevation, and it was great to finally get enough data to finalize the image:
The California Nebula in Perseus. I have tried to observe this target visually many times, but it has eluded me so far. Thankfully it is much easier to get a good image, especially with narrowband filters. This image is 2.5 hours of Ha data, and 5 hours of SII data. In the future I would like to try a mosaic to get the full nebula, with the same color scheme.
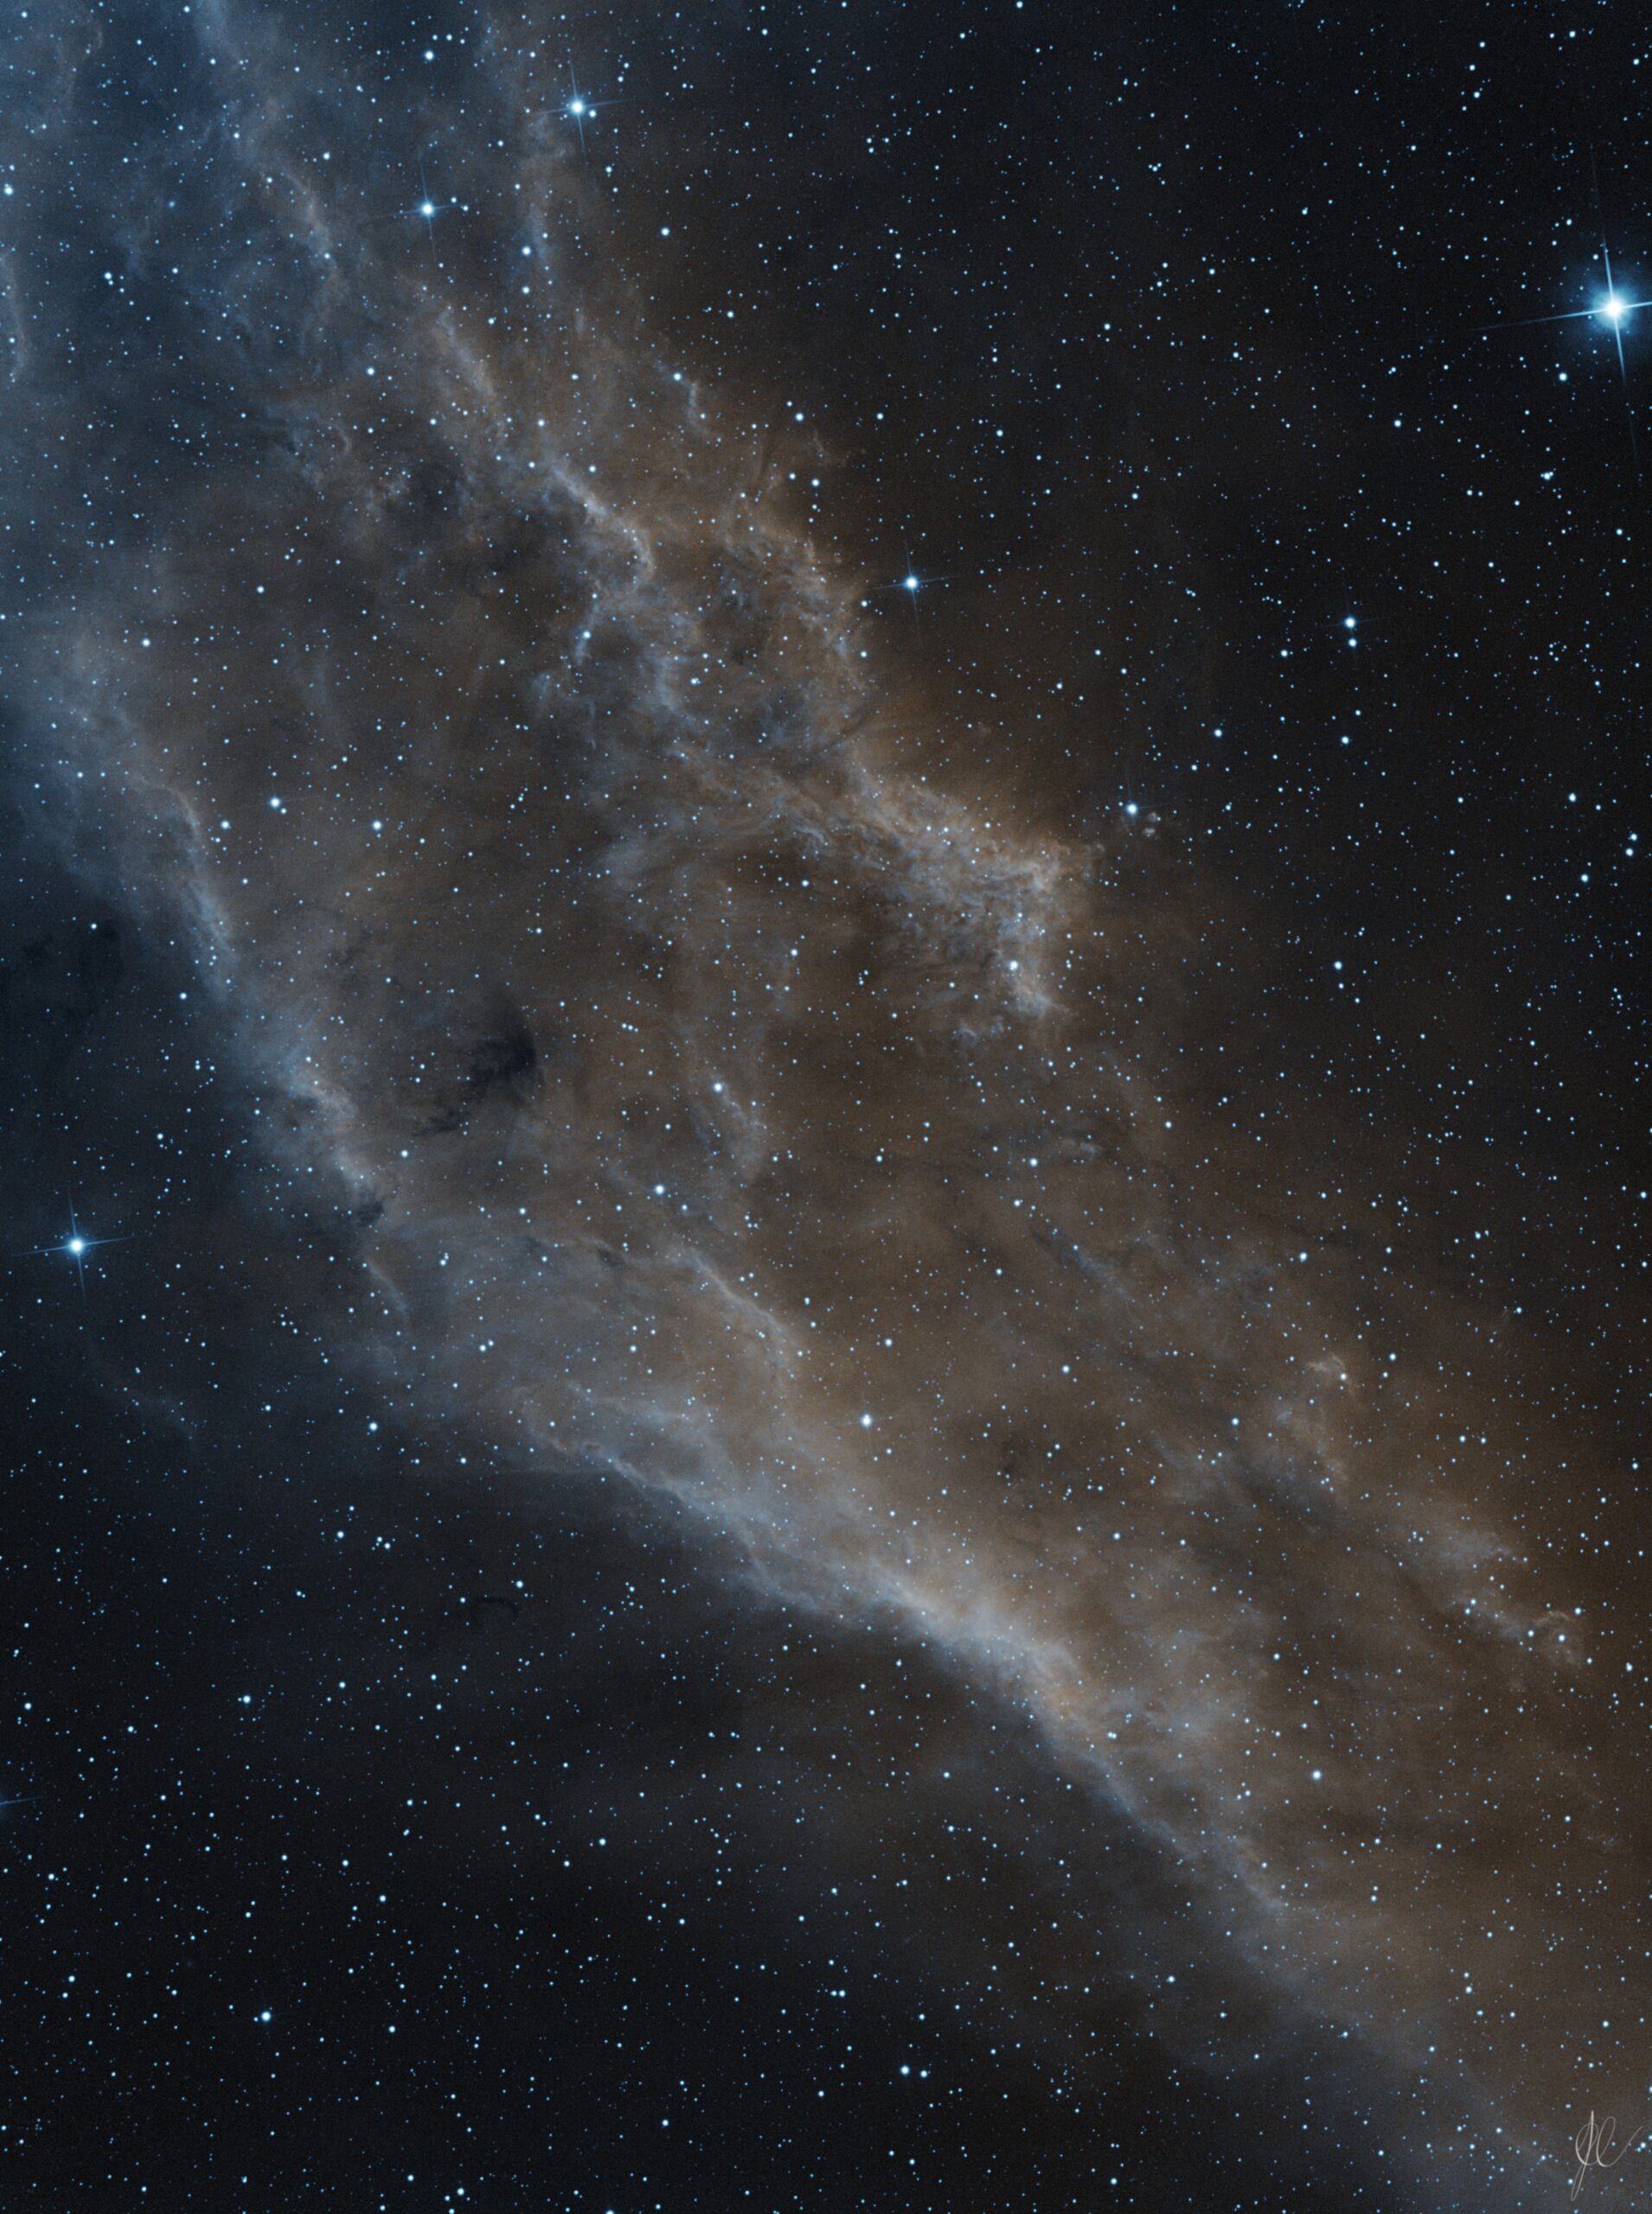
I also was at a very dark sky location (bortle 2), and got an image of the Dumbbell nebula (M 27). It was very windy, so I only got approximately 20 minutes of good RGB data, and 10 minutes of good luminance data. With little light pollution that data still resulted in an image I am quite happy with.
The Dumbbell nebula (Messier 27) in Vulpecula. I recommend opening the full version to really take in the full star field and the nebula. There seems to be more faint details around the nebula, so I hope to revisit this and get more and possibly longer exposures.
I have got several more projects in the works, hope to get them finished soon as well. Until then, clear skies!
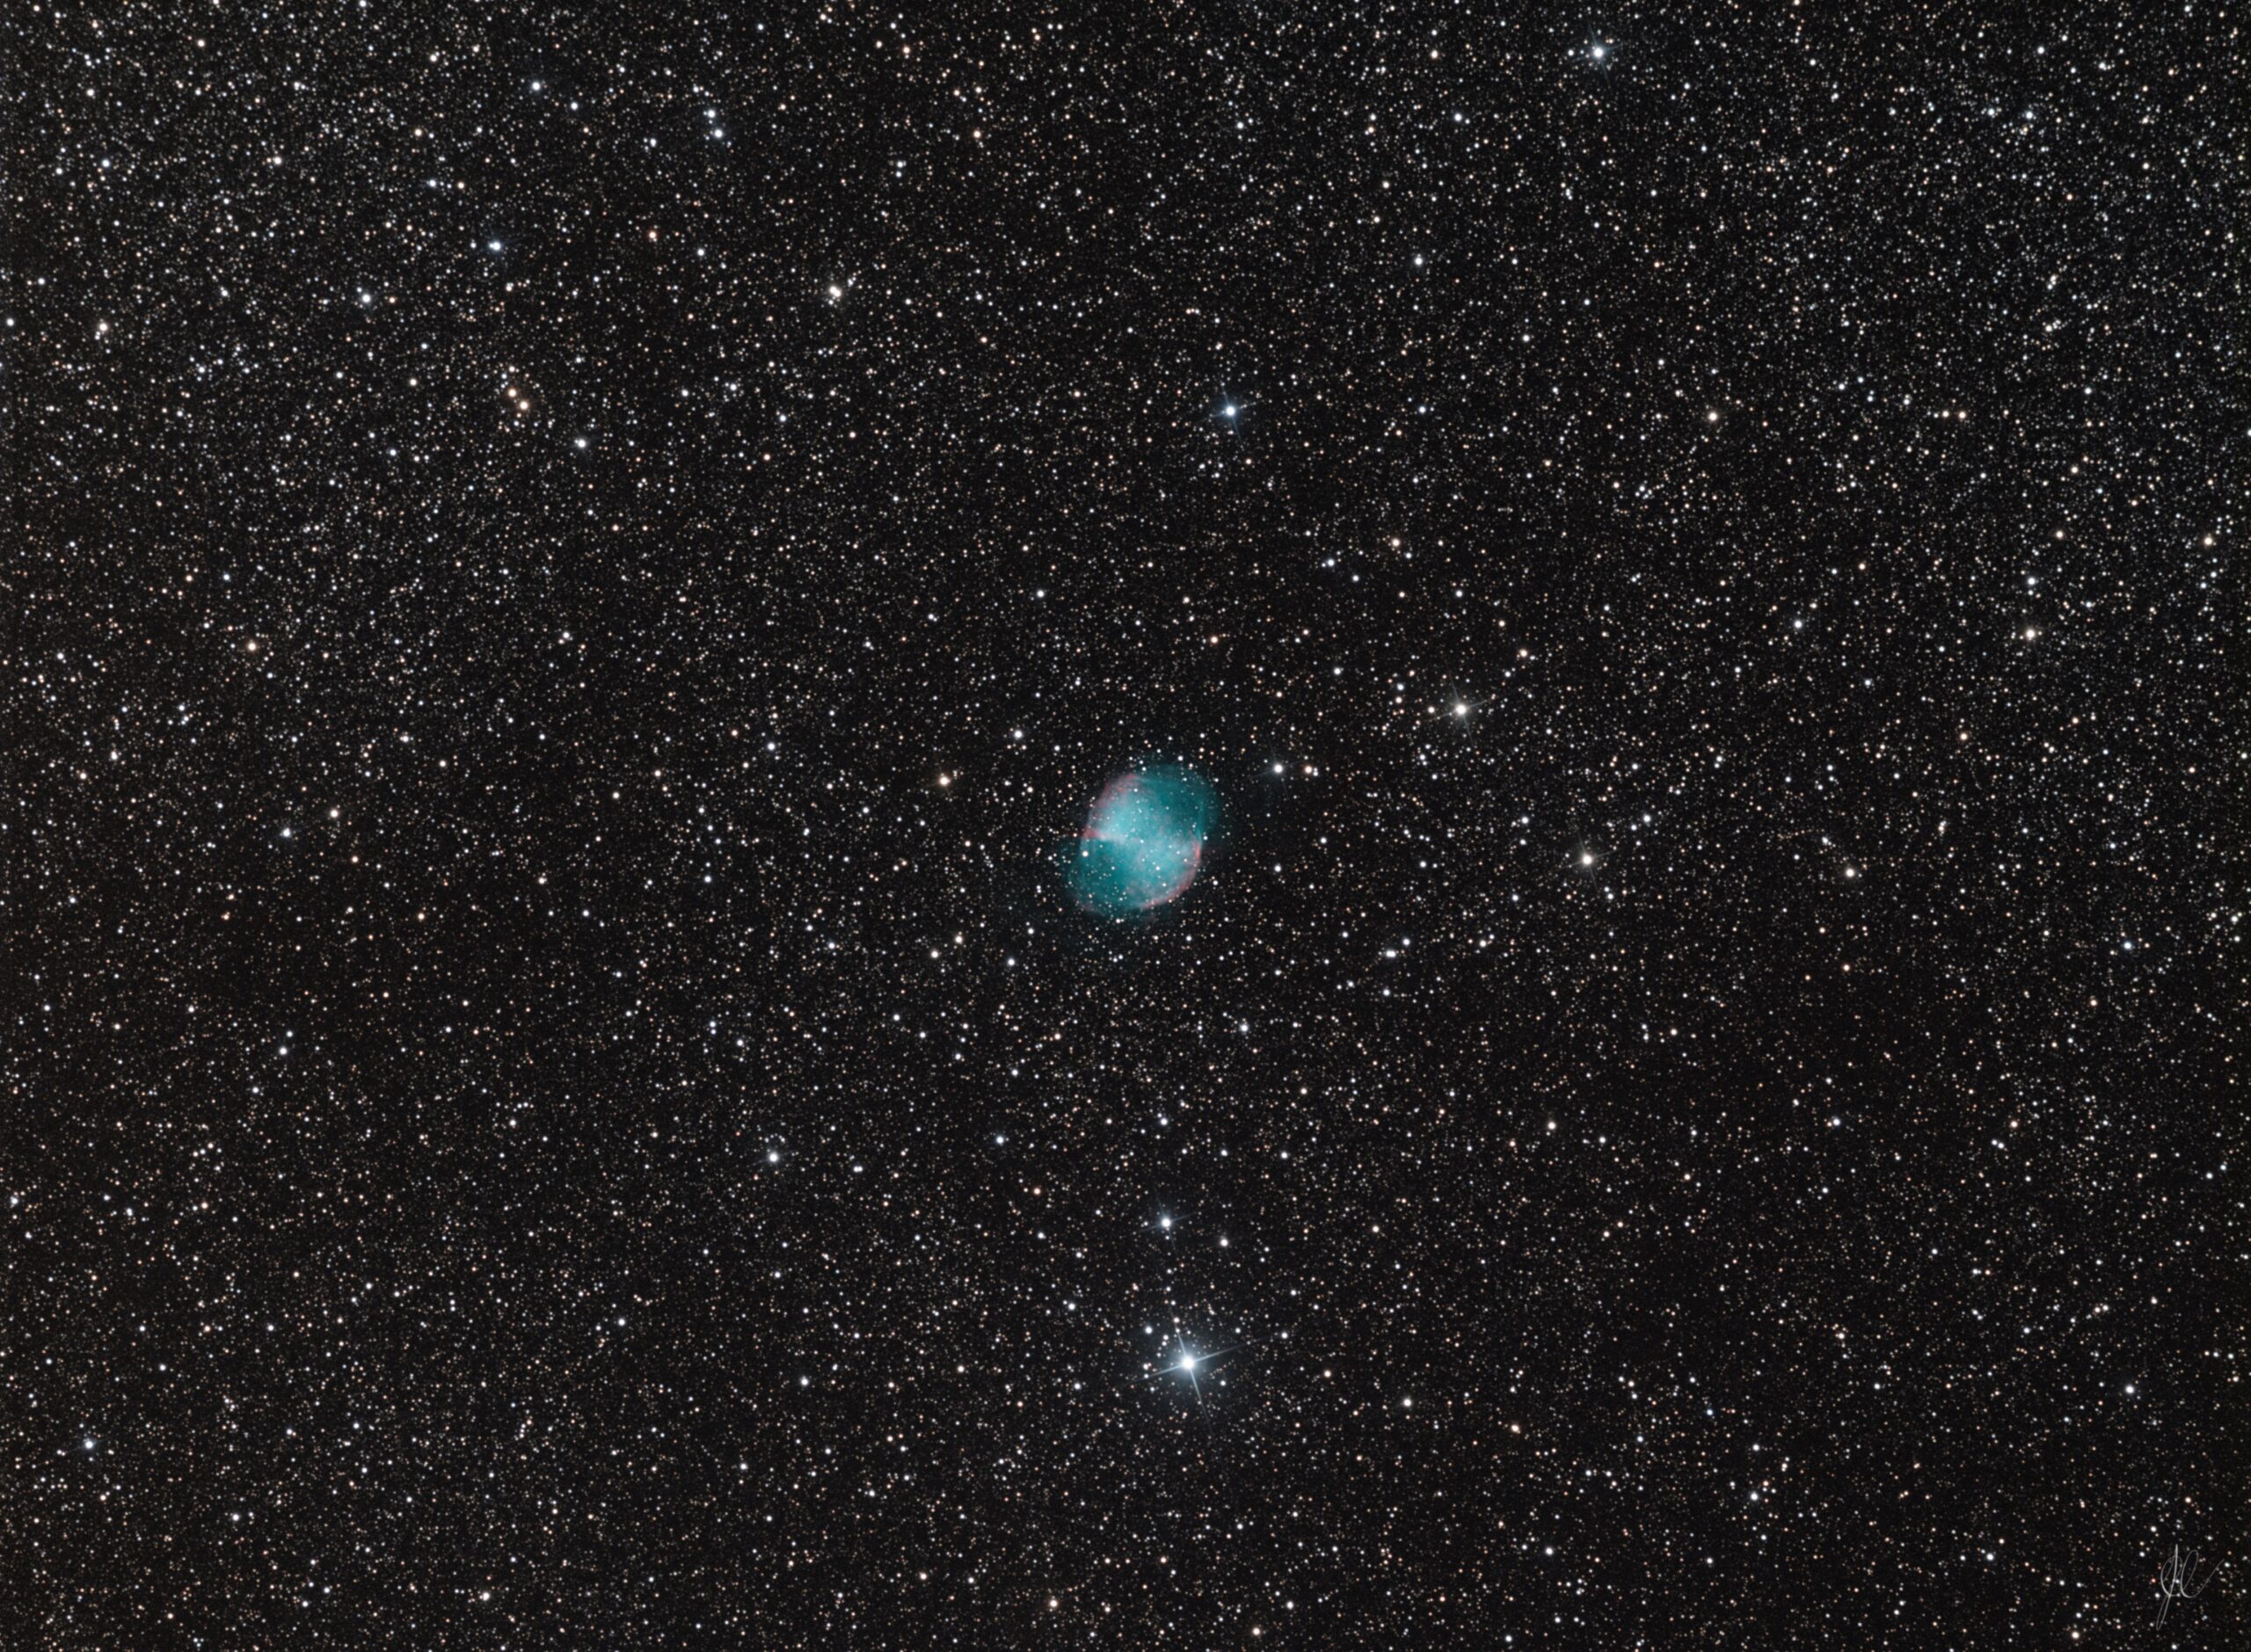
Deep sky astroimaging season is over, and I finally have some time to process all the data I have captured. The first image I have processed is an image of a the star T Lyrae, which is a very red carbon star. Carbon stars look varying degrees of red due to carbon dust scattering light in the blue and green part of the spectrum. I became aware of these stars from an episode of the skywatcher webcast.
Imaging of stars usually do not produce very distinct images, they mostly look the same. T Lyrae has a very striking color though. I see the nicks Hidden Ruby of the Harp and The jewel in the Harp floating around the web. Quite fitting.
T Lyrae – Crop of 10x15s exposures using RGB filters on my Quattro 8″ using a Starizona nexus CC/Reducer and ASI1600MM Mono camera.
This star varies from magnitude 7.84 – 9.60 according to Stellarium (7.5 – 9.2 V says AAVSO) . This means it is not visible without aid, but it should be possible to see in binoculars, and it should be easy in my 10 inch dobson telescope.
I hope I get a chance to try to observe it visually this autumn, and I am planning to image more of these to make a small collection.
It is astroimaging season, and we have had several clear nights here. I finally worked out how to collimate my 8 inch newtonian well enough to use my Starizona Nexus coma corrector/reducer.
My Skywatcher 8″ Quattro together with the Nexus becomes an F3 system, which is a quite powerful little telescope. It requires very precise collimation and focus. This can be very challenging to achieve. I have struggled with it on and off for a year, and finally got it working fine.
I think these were the main issues. If you face something similar they are worth checking out.
Primary mirror clips were a bit too tight – Sometimes (I think this was temperature related) my stars would look oddly off. Once I made a bit more room for the primary mirror the star shapes became nice and round.
Secondary collimation with an badly collimated laser – I thought my Hotech laser collimator was well collimated based on rotating it in the focuser. Turns out it is very important to rotate and then fasten it to check the lasers collimation. It was not badly off, but enough to make it very hard to collimate at F3. I collimated the laser by repeatedly rotating and fastening it in a two inch eyepiece holder, marking the laser position each time. Then collimating towards the center, and repeating until the laser point is stationary when rotated.
Secondary collimation drifts a bit – The secondary collimation sometimes drifts a bit over time. It seems temperature related, but I am not sure why it happens. As long as I check before imaging it has been fine so far.
Pics or GTFO!
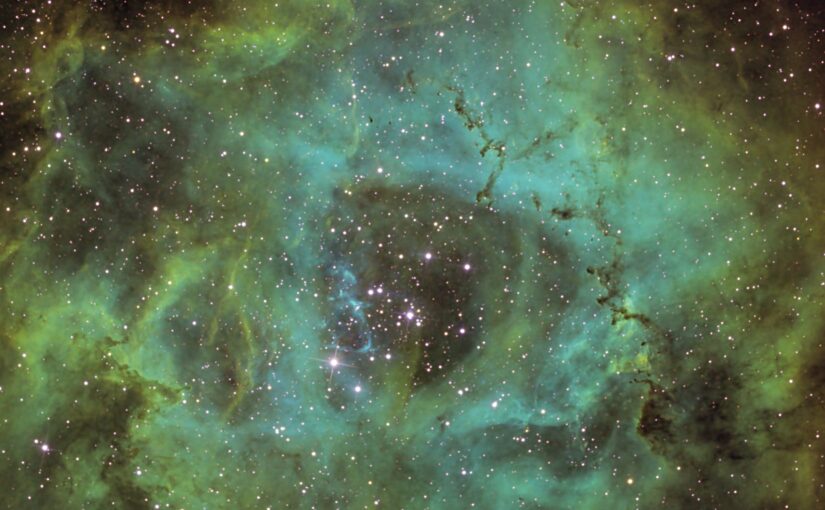
Once this was working I conveniently had the Rosette Nebula drifting by the balcony for a few hours two nights in a row. I imaged approximately 40 min of Ha, 80 min of OIII and 70 min of SII using respectively 120s, 300s and 180s exposures using my ASI1600MM camera, which resulted in these two images based on the same data.
The Rosette Nebula in SHO. Stacked using Astro Pixel Processor and stretch in Pixelmator Pro. It was not a very noisy image, but I did an ML denoise and a slight sharpen to deal with some noise at the edges. This version is slightly cropped due to rotated OIII images not aligning with the Ha and SII.
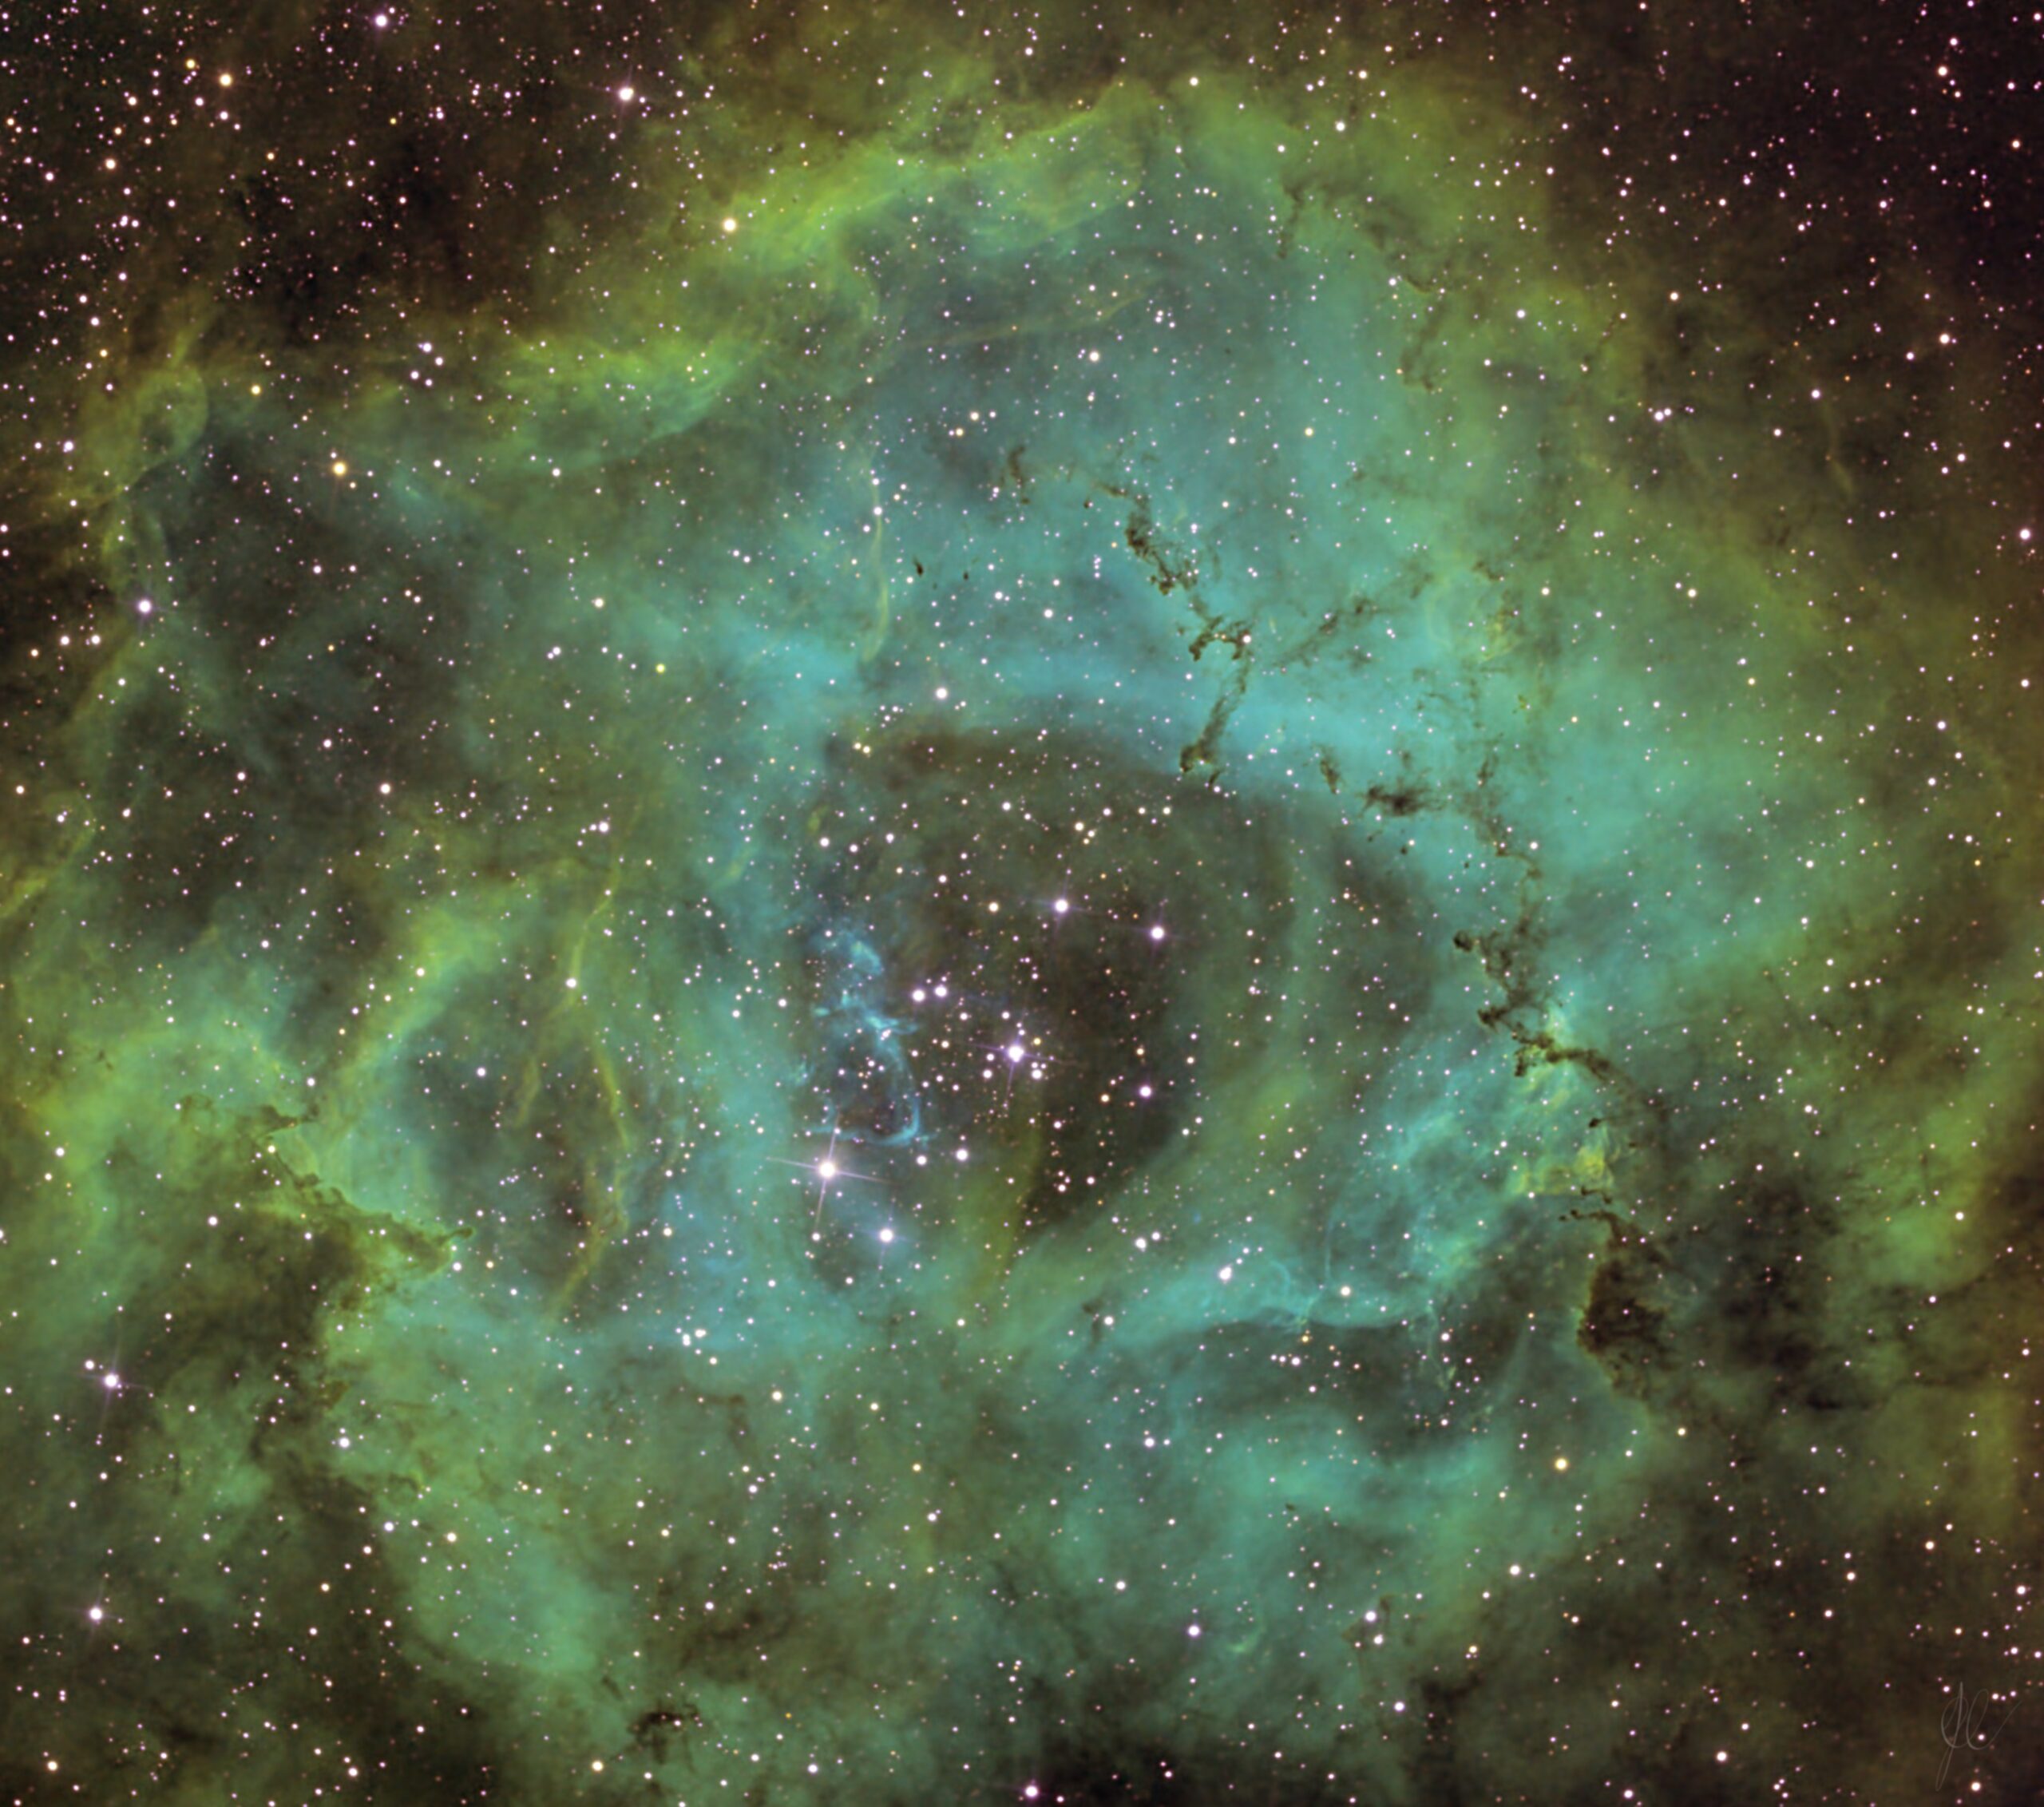
Same data with nearly no crop, doing a HSS coloring.
I like the SHO a bit more, but the HSS version looks really menacing and stormy. If I was a W40K artist, this is how I would depict a gate to the immaterium.
I think this setup fits the normal seeing here in western Norway a bit better then the basic F4 setup of this telescope. As mentioned it requires very precise collimation though, so you either need to be experienced or be prepared to use some time to get everything right.
I really hope I get some time at a nice dark site with this setup soon.
After deciding to buy a proper equatorial mount (an SW EQ6-R Pro) with an astrograf , imaging has become much easier. I have also finally learned how to do collimation of mirrors well enough for it not to be a complete nightmare. It is still pretty nightmarish in the cold and dark, but what isn’t.
Guiding (using this camera in my finder scope to track stars) also has helped imaging a lot, since it partially compensates for polar align not being perfect, as well as allowing really long exposures if needed. From the city I do not see polaris, so I just do a very rough polar align and hope guiding deals with the tracking issues. I should probably learn to improve polar align based on mount tracking errors, but it seems like such tedious procedure. I have yet to find the energy to learn it.
The quality curse
One nice thing about lucky imaging DSOs is that most non tracking related image defects are not really a problem, since they are swamped by tracking issues. I was super happy if I got halfway decent data. Now with proper tracking I get really annoyed by tiny technical defects.
Anyway here are my best images from this year so far. I had a lot of fun taking these and editing them. They are all taken with only dark calibration frames, and either using fake flats or no flats. AstroPixelProcessor is magic, all the DSO images are stacked partly post processed using it.
The images
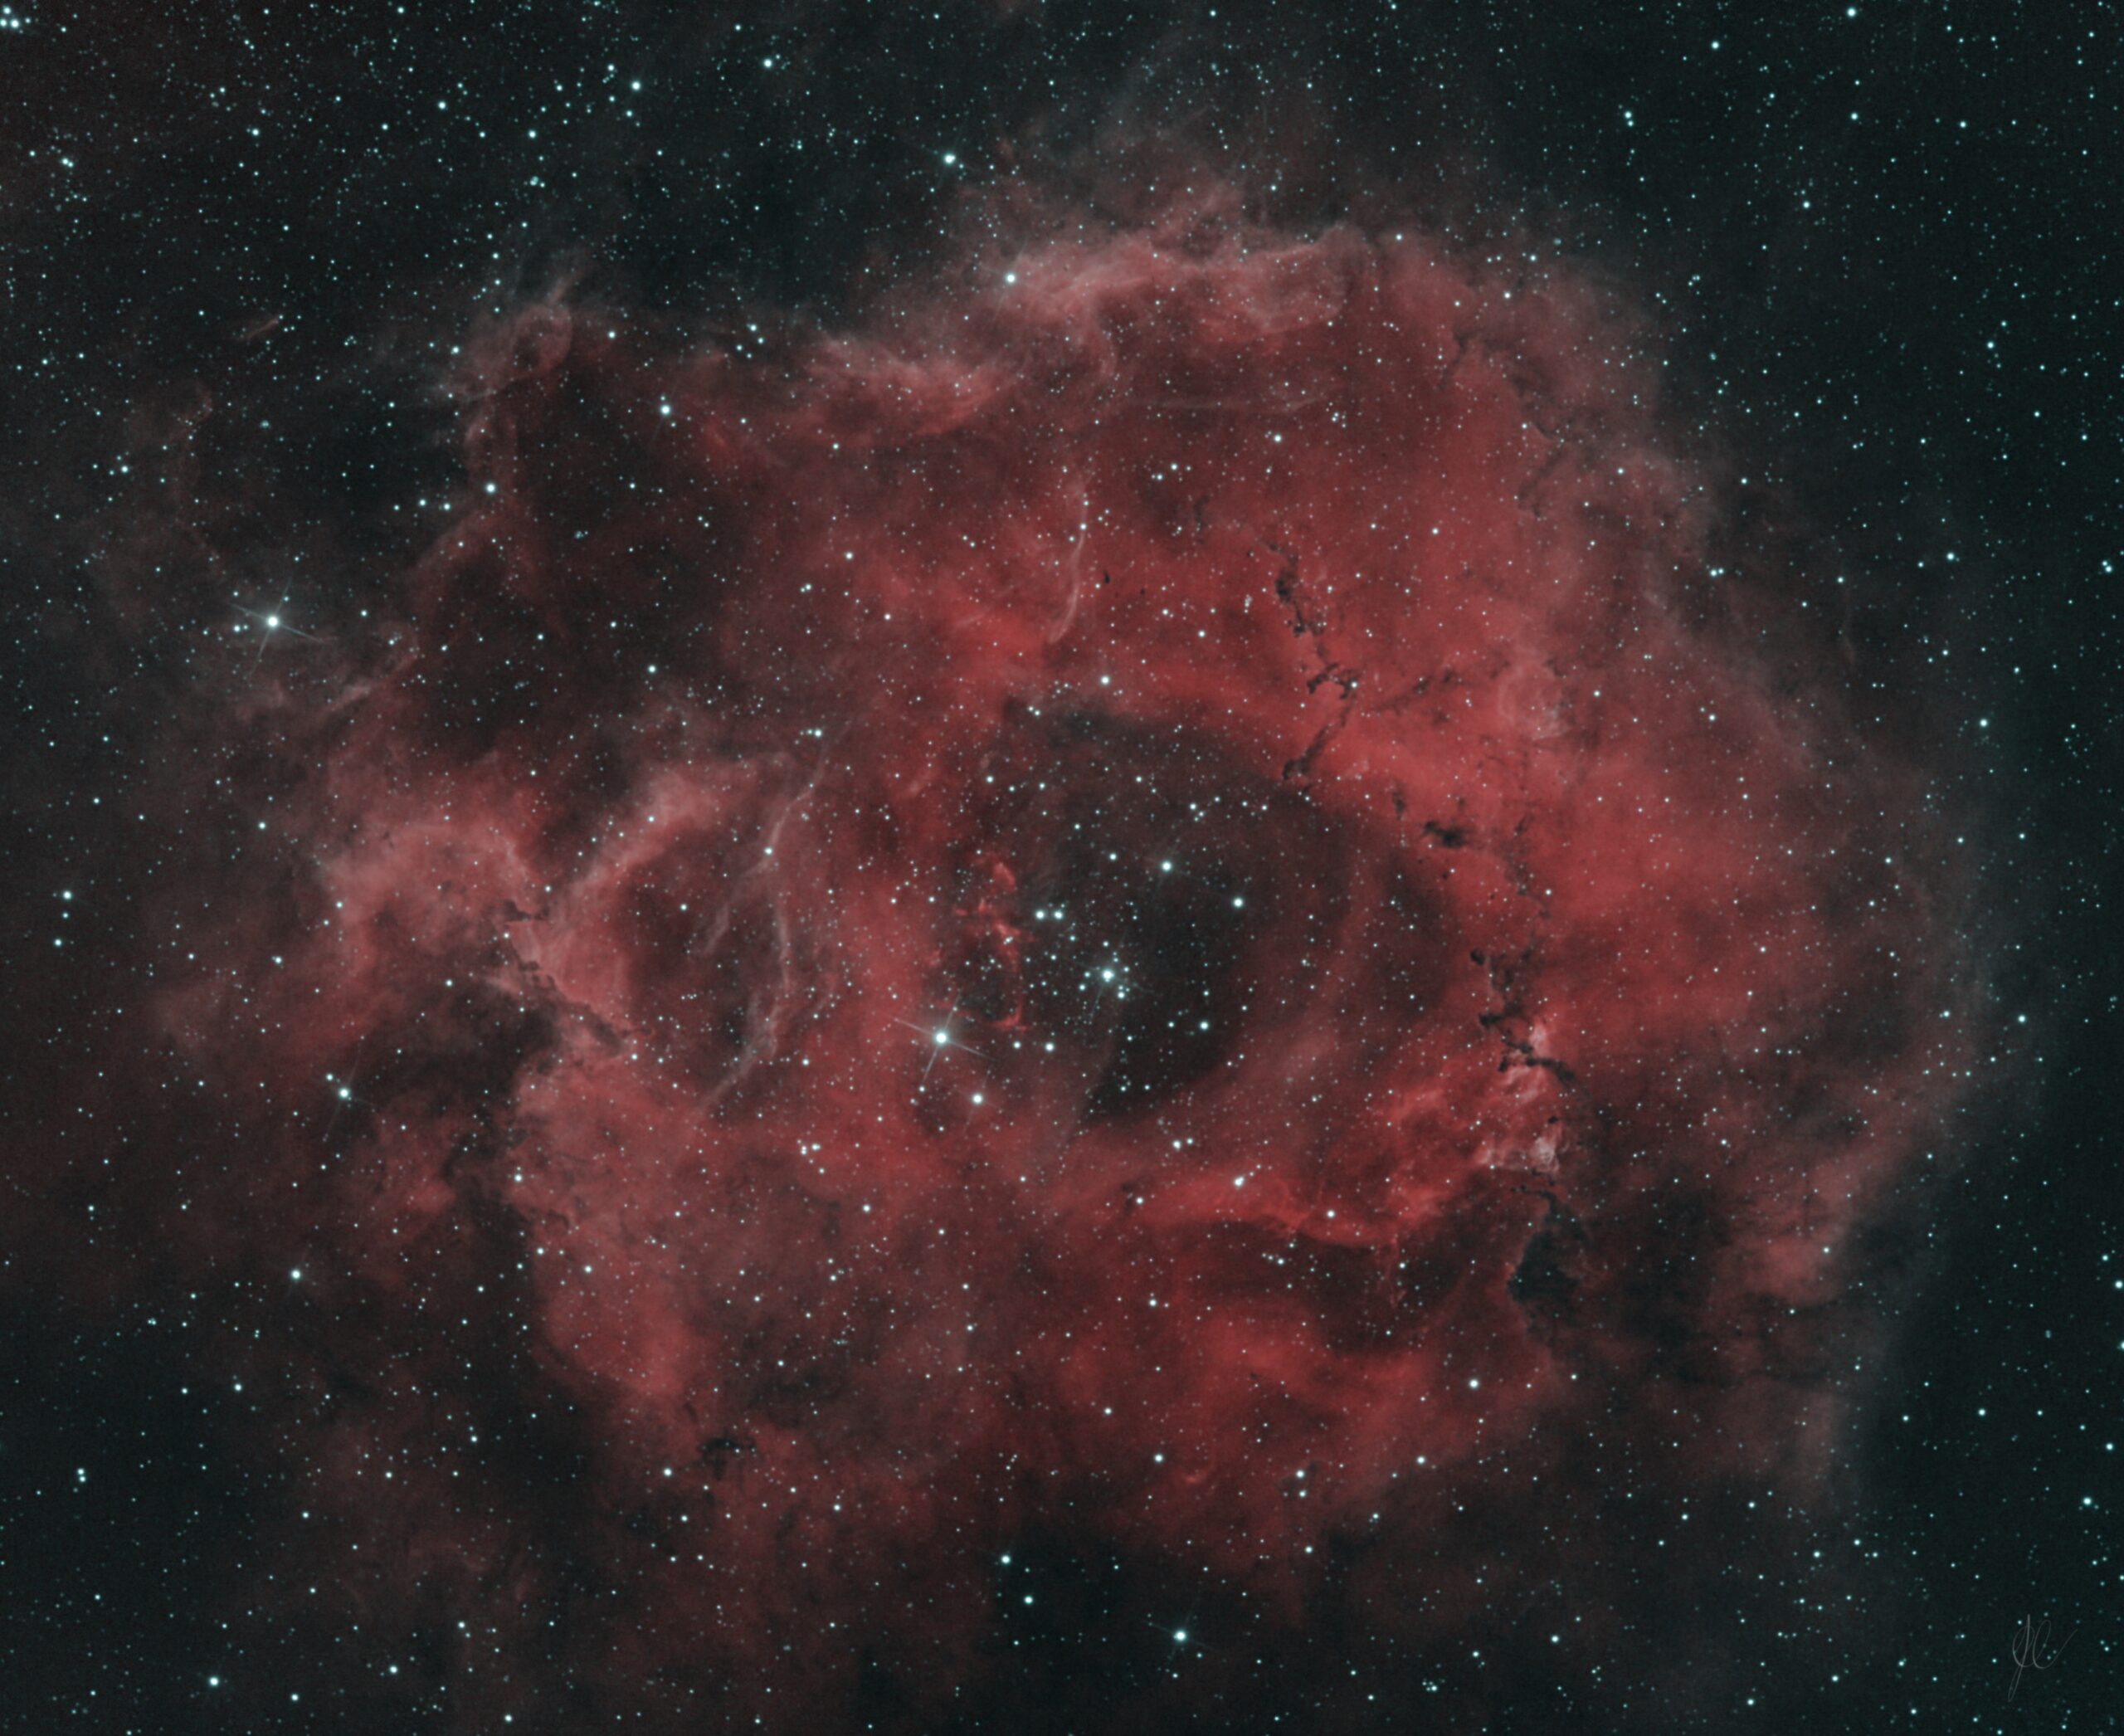
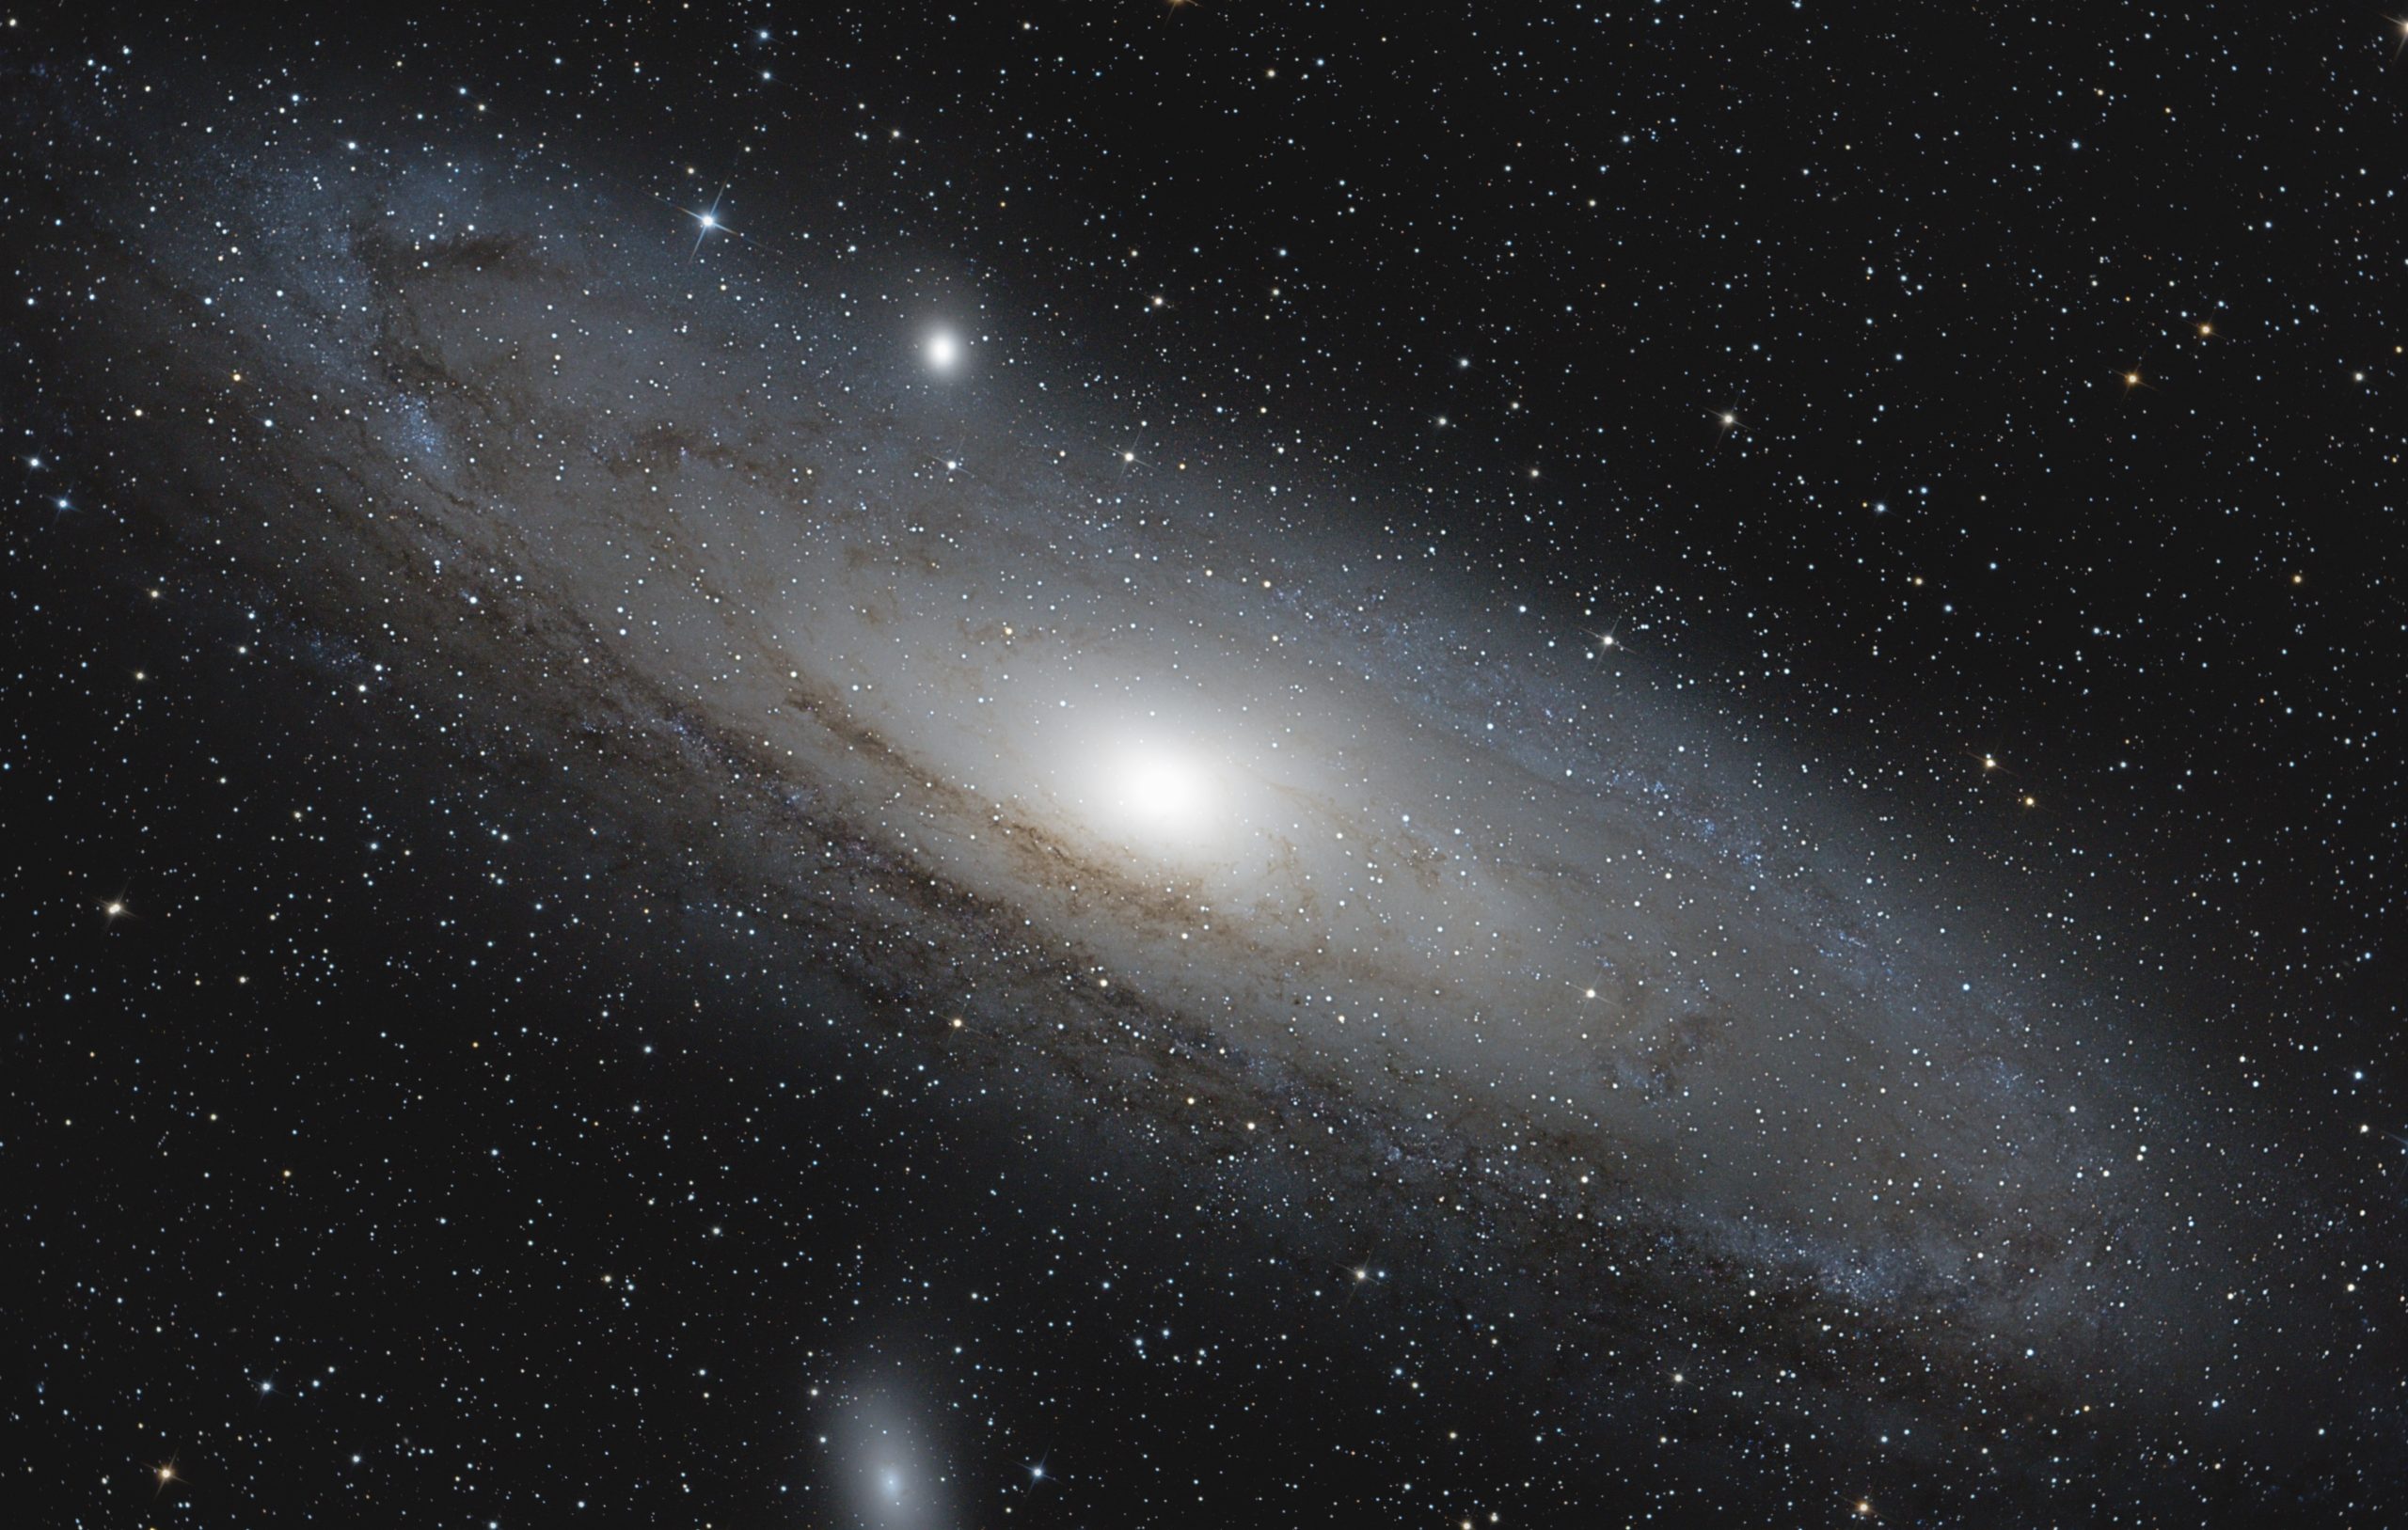
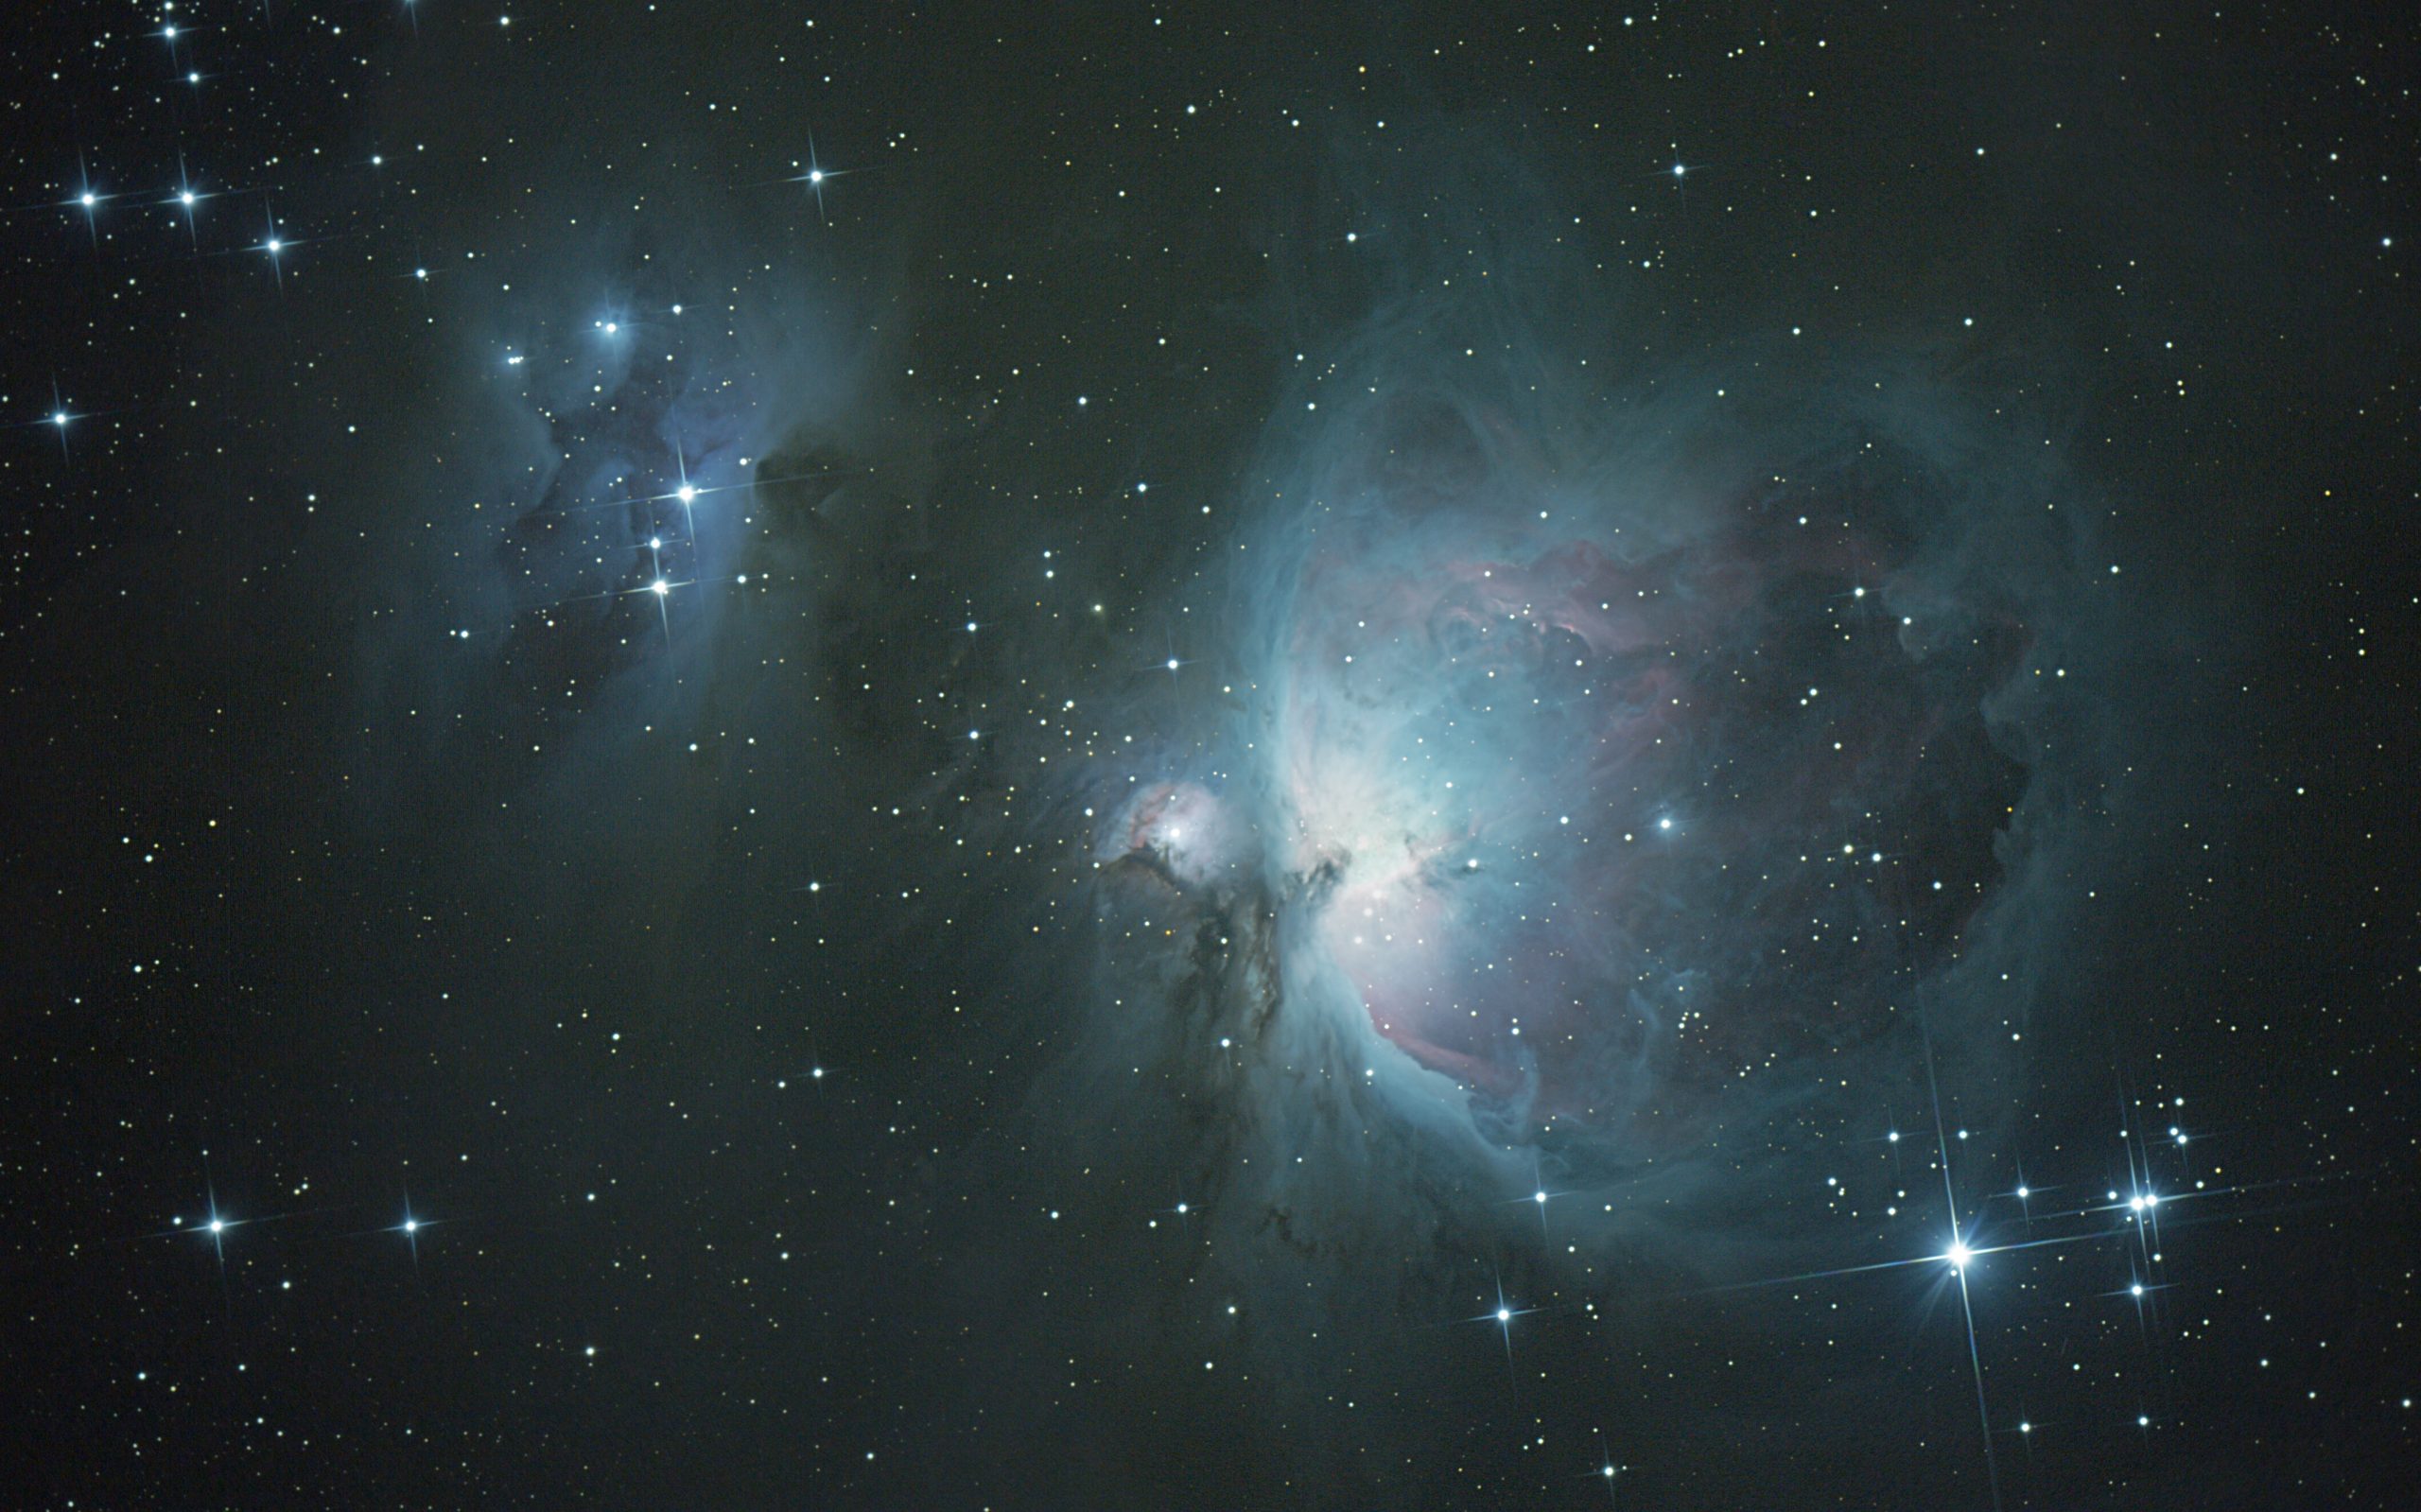
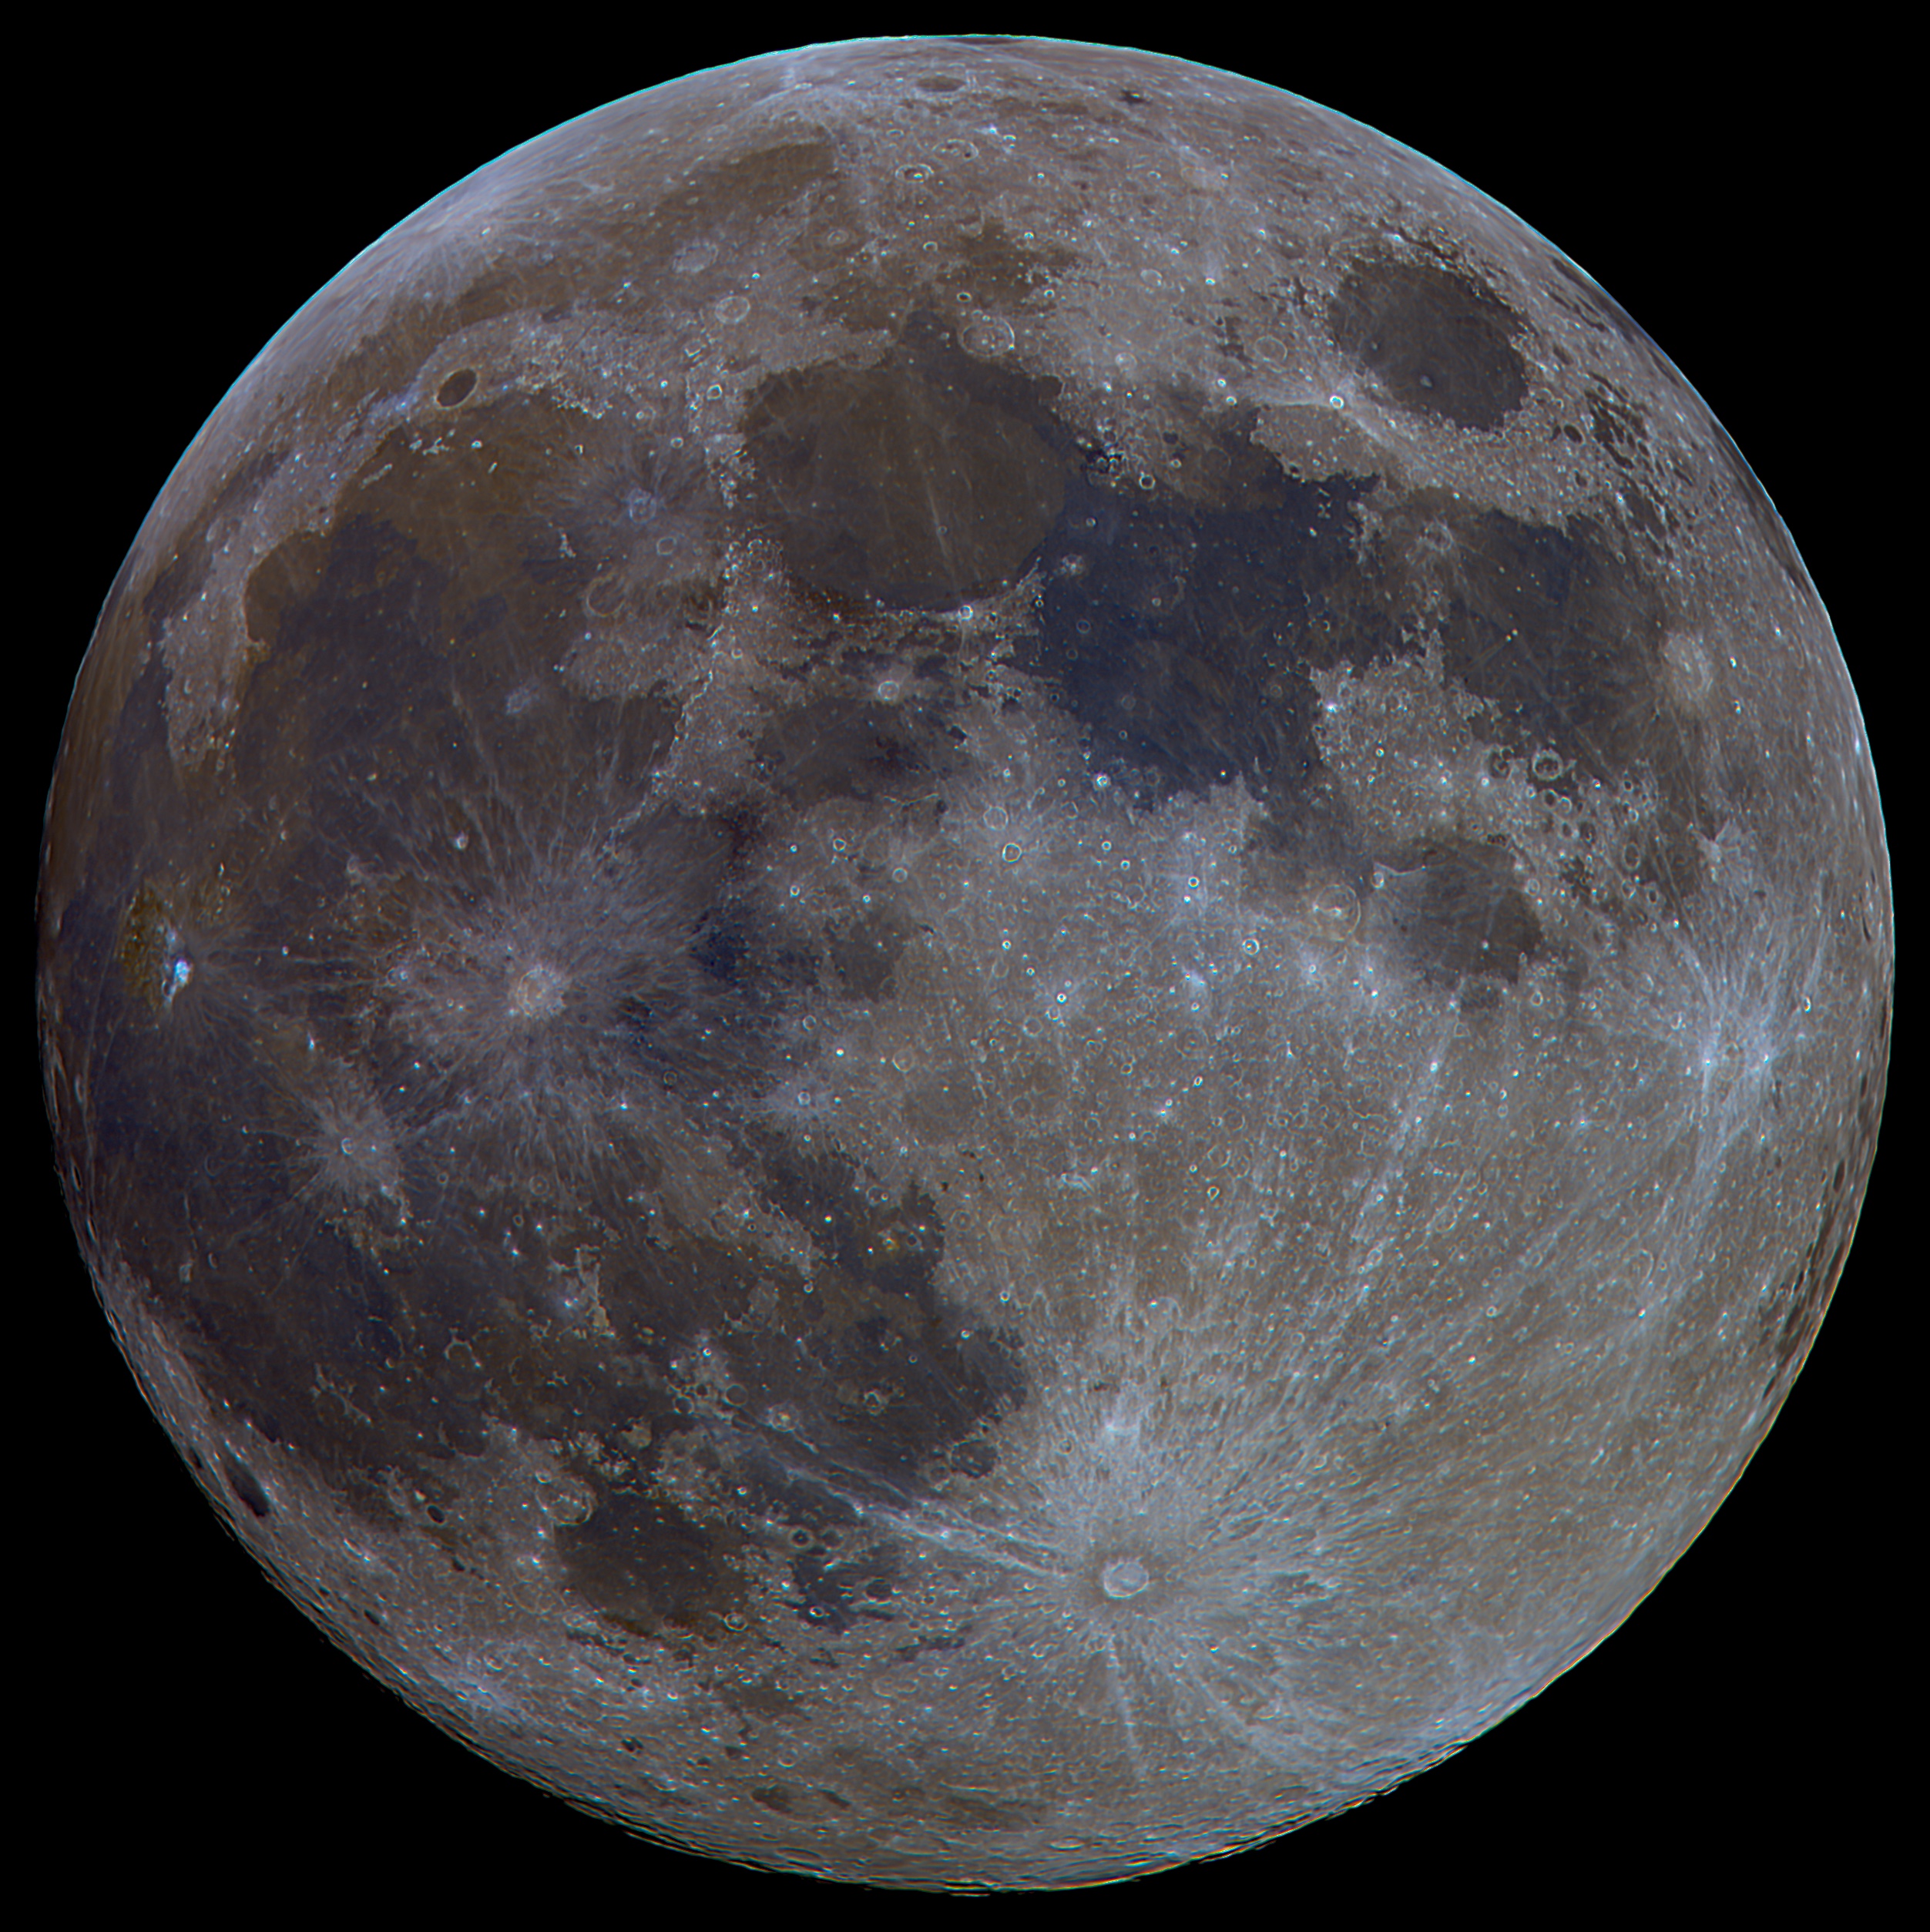
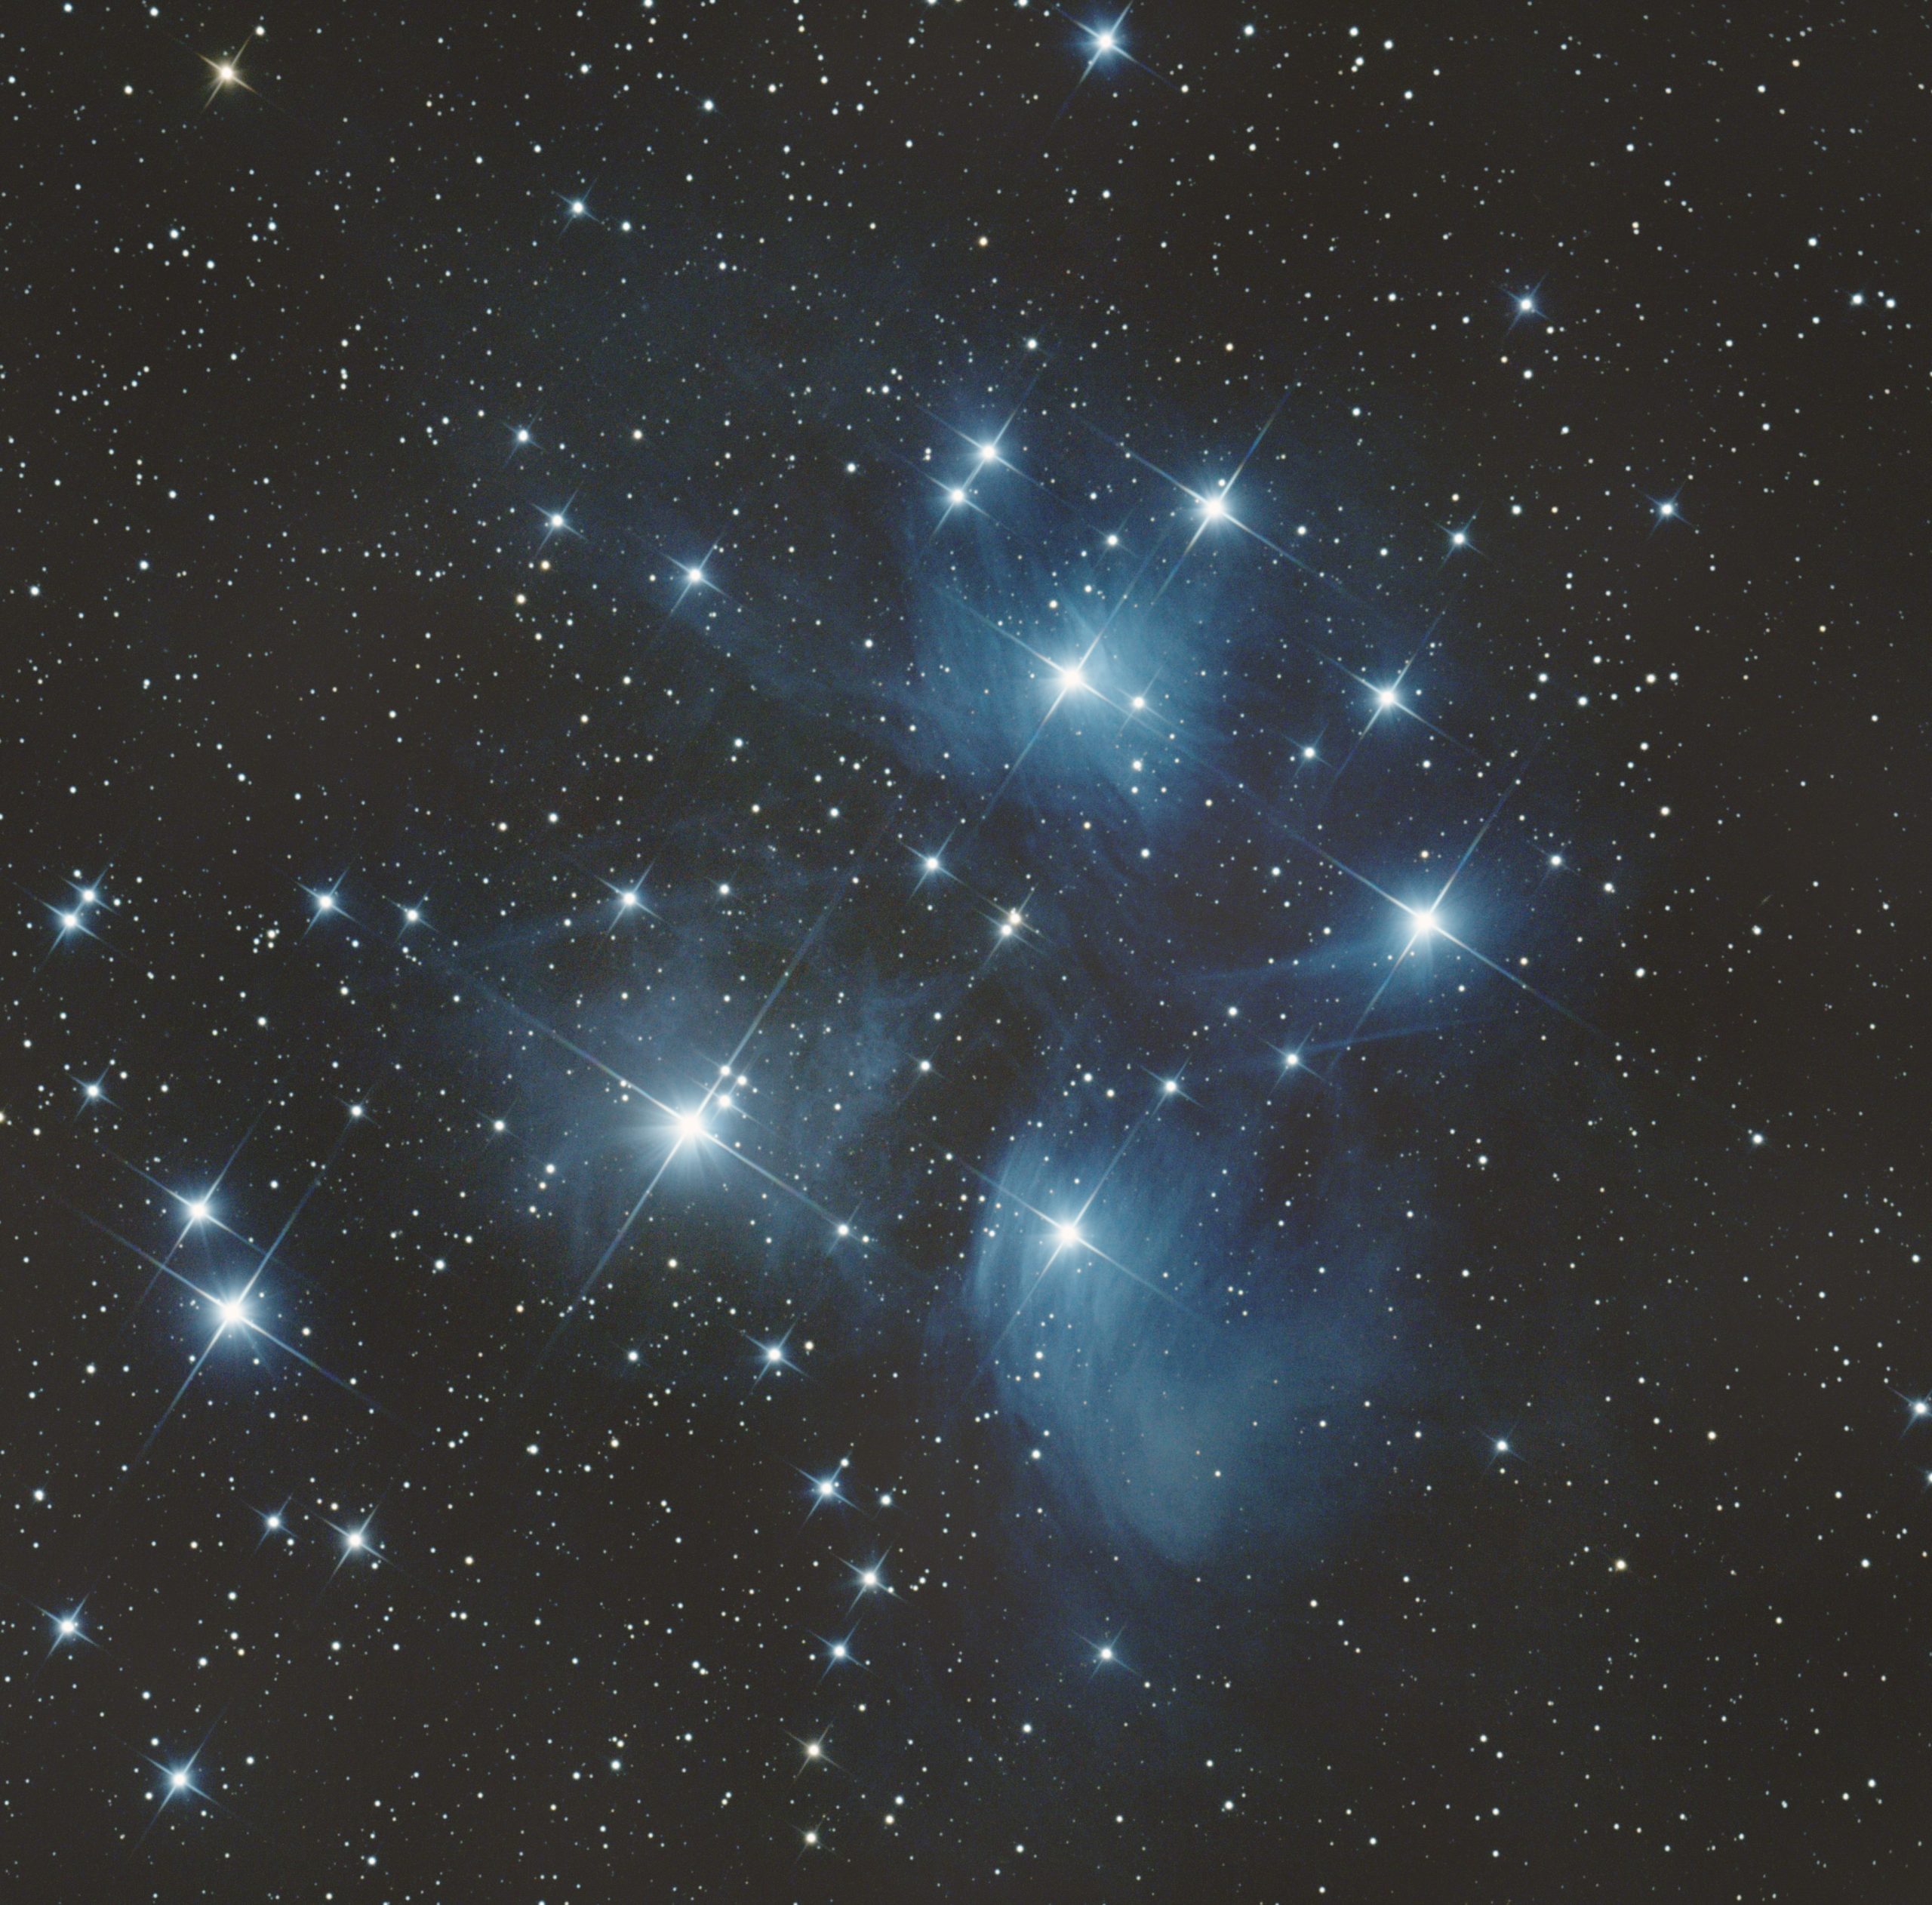
M31 – Andromeda galaxy, as well as M110 and M32. Approximately 2 hours of 180s exposures at 1600 ISO.M42 – The Orion nebula. I think I managed to nicely balance the very bright core and the rest of the nebula. A mix of 30s and 60s exposures at 800 ISO. In total 1 hour of exposure. Then some creative editing to keep some detail in the core.Moon, with increased colors saturation to show the different shades of gray reflected. This is 130 images stacked, from a series of 1000 images. It was stacked using PlanetarySystemStacker, which is very neat for us Mac users who otherwise do not really have any great native stacking applications for planetary images.M45 – Pleiades. This was a hard edit since it was taken from bortle 6 skies with no filters or anything. UGC 2838 is also visible in the upper right part of the image. That is one pretty faint galaxy!
I am bitten so hard by this hobby so expect more astrophotography related content. I will try and post other stuff as well, but this is way too much fun.
Something that feels like a once in a lifetime event happened here in Bergen this spring. We had four consecutive days of clear skies, with very little wind and no moon!
Earlier on the blog I have expressed the desire to try and image Messier 13 on consecutive nights, to see if I could see the difference in magnitude in the variable stars in the cluster. Especially the variable star V1553 Her, which has a very convenient period of approximately 5 days. 4 days of observing would get me most of the period.
These 4 days were pretty late in spring (30th of March to 2nd or April), and observing had to be done after 10PM in a work week. Not ideal. Thankfully except from the usual tracking problems, there were few problems with the equipment. My own patience failed while doing focusing though, which resulted in two nights with good images, and two with not so great quality.
This was a bit problematic since I wanted to compare images over time, and since I had 40 good images from one night, and 10 from another there was a big difference in the brightness of the stars once I was done stacking images from each night. To account for this I did some brightness matching in post processing matching on the non variable stars of each frame.
The resulting 4 frame time-lapse looks like this.
I was pretty happy with this, as it shows the variability of not only one, but at least one more, and maybe even a third variable star I missed at first (Can you find it? This paper has charts to help). The change in brightness especially for V1553 Her was also much clearer then I expected. Great success!
The process to find the distance to the star from the magnitude and variability data is neat. Since V1553 Her is a Type II Cepheid (how this was determined is not clear to me, please add a comment if you know) which period is approximately 5 days the star has an absolute magnitude of approximately -1.5 according to this chart. The formula below (from here), should then give the distance \(d\).
$$ M_v = m – 2.5log((d/10)^2) $$
Looking at the images and the reference stars, a rough estimate would be that V1553 Her varies between 12 and 13 in apparent magnitude. Plugging in -1.5 for \(M_v\) and 12.5 for \(m\) gives the distance of 6310 parsecs, which is 500 parsecs off.
While I have not followed a very thorough process here, it is anyway nice to verify that my data seems to fit to reality. To get better data for deep space objects, I am evaluating to get a solid equatorial mount with either a small refractor or an 8 inch newtonian for imaging, and keep my dobsonian for visual and planetary. Once I do I hope a can revisit this project and get a time-lapse with much higher quality. Maybe do one which would also capture the really fast variables with down to 0.2 days period.
I have long wanted to try to observe a planetary nebula, but I think I had the size all wrong. I was looking for something larger.
In my finder scope M57 looked a lot like a star, and if it was not so easy to locate due to being in between two bright stars I would have probably scanned past it. Once I found it, the ring structure was clearly visible at medium magnification. Really neat!
I think that having calibrated my expectations now, finding other planetary nebulae will be easier.
Earlier this year I ordered a 2x TV Powermate mainly for planetary observation. To test it I tried using it together with my 2″ Aero on the globular clusters and M57. It worked way beyond my expectations.
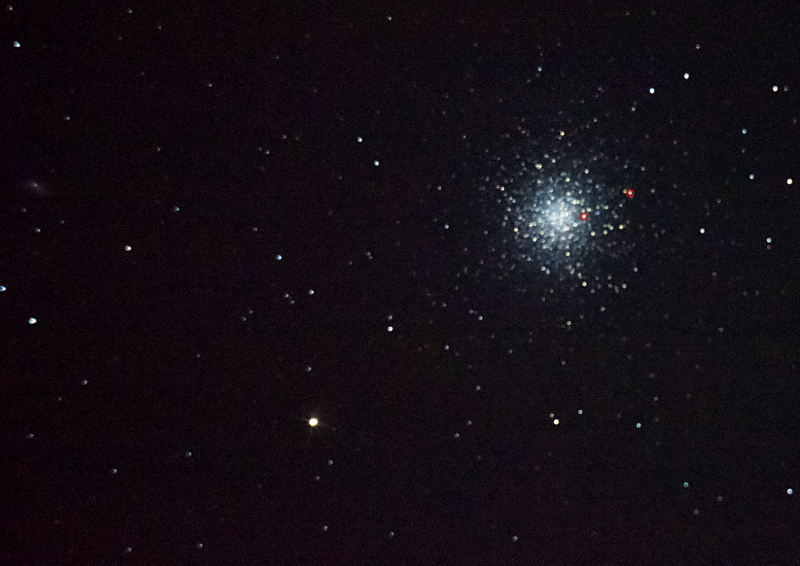
I also took 15 seconds exposure of M13 below (the most my tracking was good for). The two red spots I marked are two variable stars, which I found comparing the chart here to my image.
M13, with two marked Cepheid variable stars. These are stars are used as distance measures, since their period determine their absolute (actual) brightness.
These stars have a periodic change in brightness. The period of their change in brightness determine their absolute brightness. Then the relative brightness (the brightness observed from Earth) and the absolute brightness can be used to find the distance to the star.
It would be really nice to try and observe M13 with the same magnification over time, and see if I can catch the blinking.
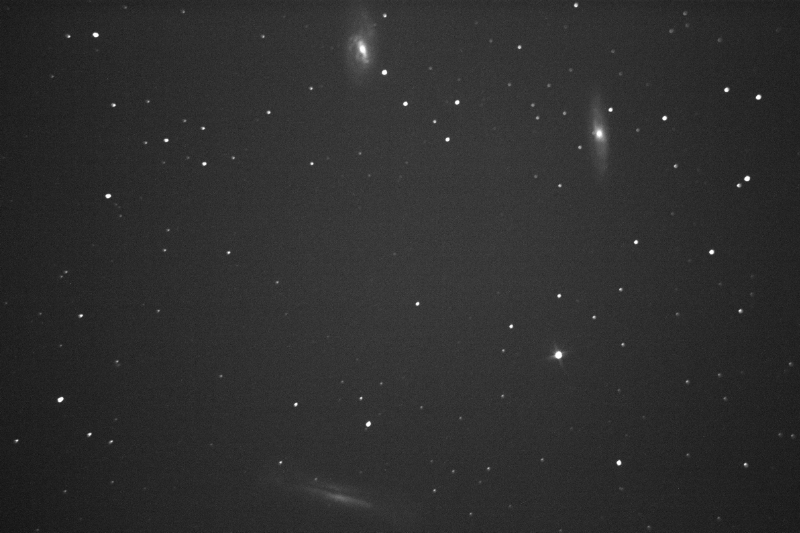
I observed these galaxies visually some time ago, but this time I got to take a series of pictures as well. Out of like around 20 exposures of 15 seconds, I got 6 images that were fine. After stacking this was the result. Noisy, but some structure at least.
So I finally got to try to take astro photographies from somewhere with less light pollution. I still have trouble with movement from either my tracking lagging a bit, or me not having a remote control for the camera (so I cause movement in the telescope when I start the shot).
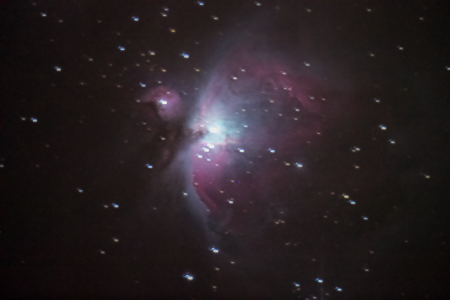
M42 – Orion Nebula again
M42 is so easy to find observe and shoot. I also finally got to see some of the Flame Nebula, by doing a 30 seconds exposure into what looked like nothing at all. It sadly did not turn out very well because of movement in the camera, but I finally saw something! Anyway, here is my M42 shot. Getting better at this!
M42 20s exposure with pretty much no editing. Increased contrast a bit and moved the black point.
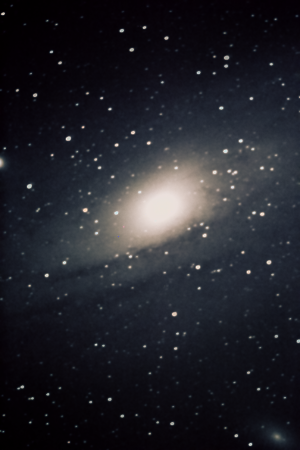
M31 – Andromeda Galaxy
The moon would easily fit in this picture, but the Andromeda galaxy takes more space, so this is mostly the core and some of the arms. I think I could fit most of the galaxy if I had rotated the camera. I randomly also caught M32 (barely visible at the left edge) and M110 (in the lower right corner). Looking forward to try Andromeda with an even longer exposure, or many stacked images.
M31 30s exposure, and some editing (contrast, black point)
A month back I finally got a new stepper motor and got the tracking for my telescope working. One dark night I took it to a pretty dark spot close to Bergen and did some observations.
I have observed the Orion nebula under bad light pollution before, but this time I got to observe it with under better conditions. It was stunning. Very sharp.
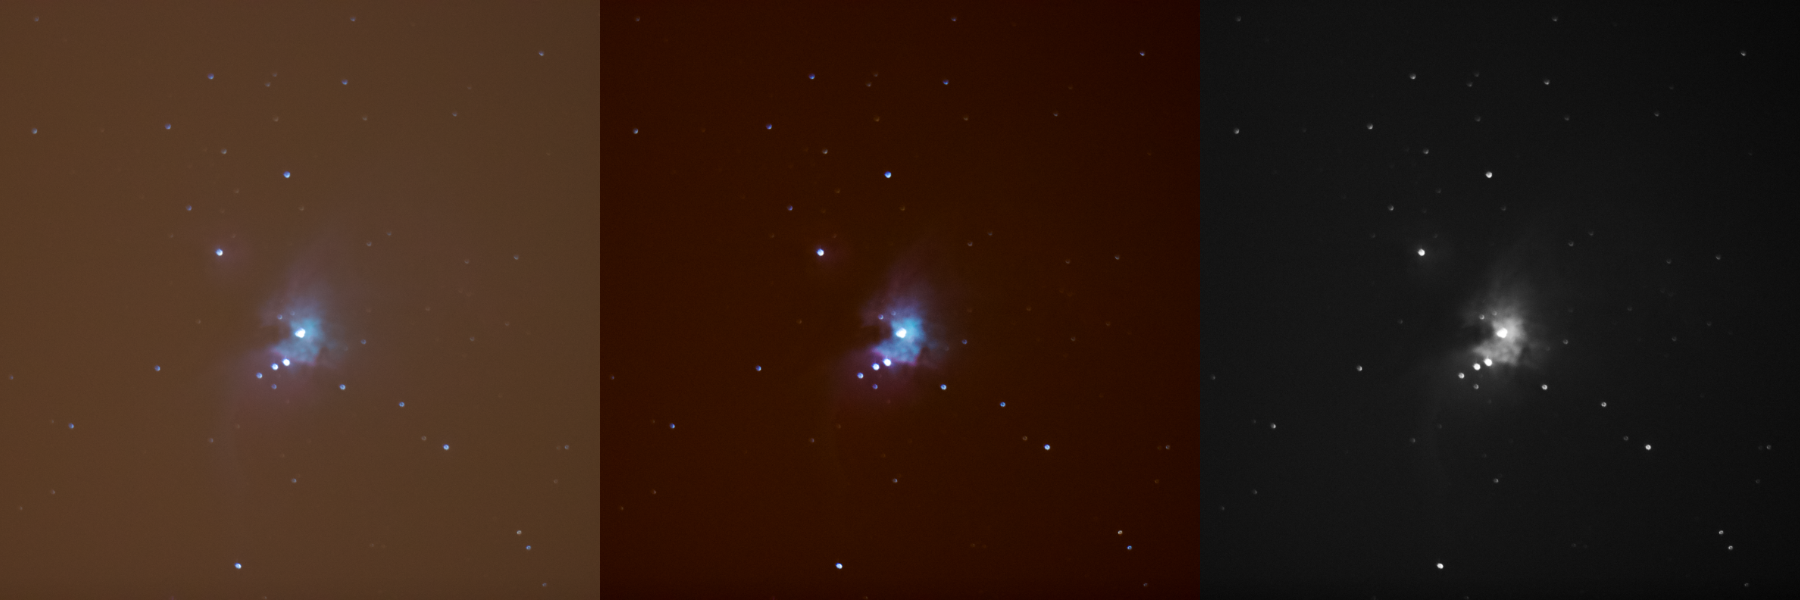
The next day I took my first deep space photography ever from our apartment. The light pollution was really bad, and there was some smog as well. I also forgot that I could use a timed shot. So i think some blurring is due to the camera moving slightly after I started the exposure.
I think it turned out fine for a first:
M42 taken with a 5 – 10 seconds exposure. Very heavy light pollution. The left image is the raw image, the right ones are versions where i increased contrast and tried to remove the pollution. The latter is an attempt to make it look somewhat like what a visual observation of M42 looks like in my telescope (it is sharper when visually observed)
My original plan for the trip, was to observe M42 and the Andromeda Galaxy. I was also hoping to get to see the Flame Nebula since it was really dark. I sadly did not see any trace of the Flame Nebula so I started looking for some open clusters to look at in Taurus. While scanning for them I suddenly saw that the Crab Nebula was close, and I found it immediately. It is the first supernova remnant I have observed, and I think I saw some small amount of detail. Hoping to get a picture of it one of these days.
Andromeda is a not that interesting to visually observe since it is so hard to see anything beyond the core. I think I saw some more since it was really dark, but it was very faint. These two are prime targets for a photo some day, since that should bring out some more detail.